
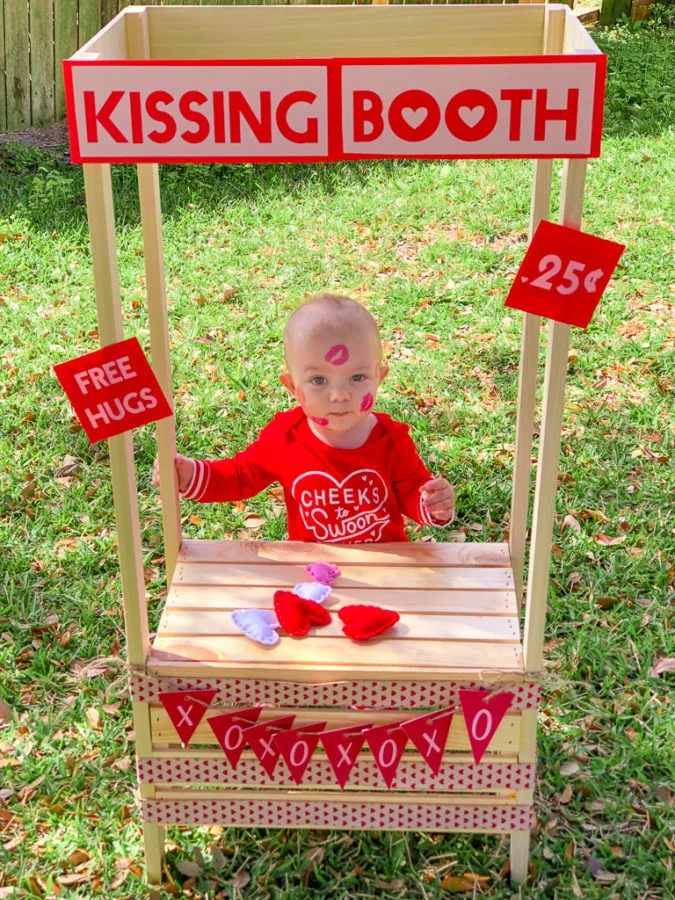
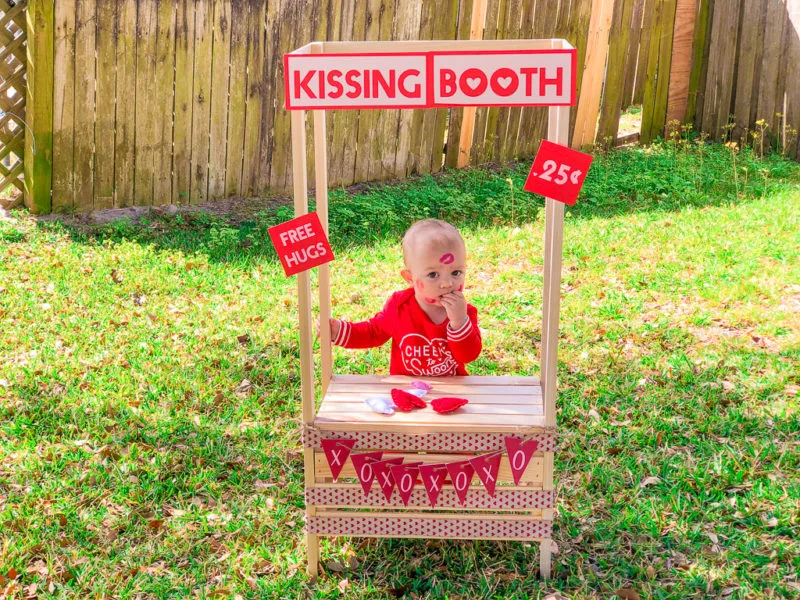
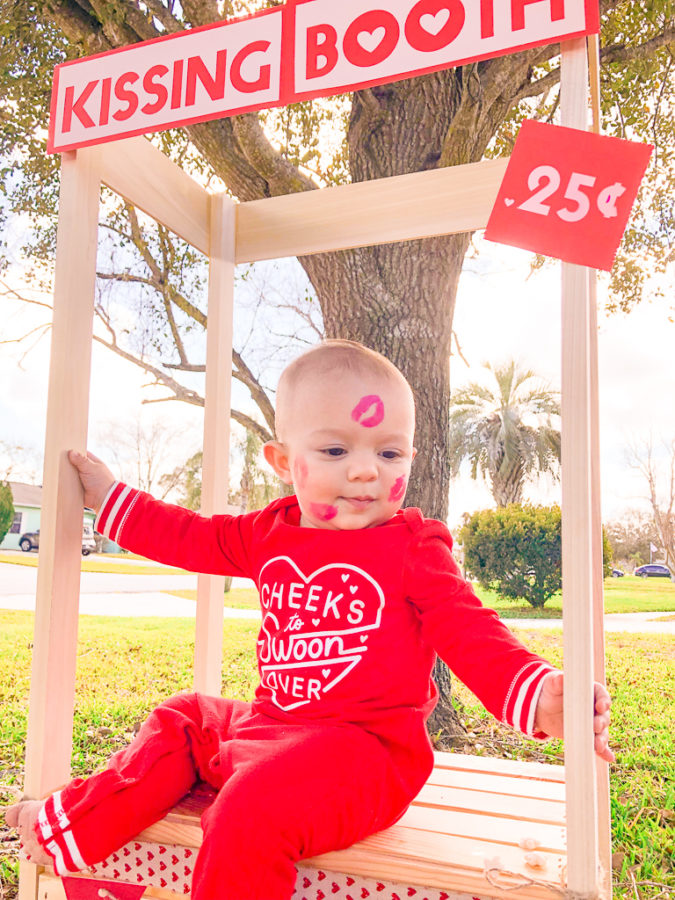
This tutorial will teach you how to build a photo booth that can be used as a DIY Reusable Kissing Booth with your Cricut, some wood, and paper!
I had a brilliant idea as I was walking through Michael's one day. I'm not always a planner when it come to shopping. There are some stores I visit just to snag the deals.
That's what happened when I stumbled upon the wooden crates that were on sale for $10. I thought, hmm, what excuse can I use to buy this?
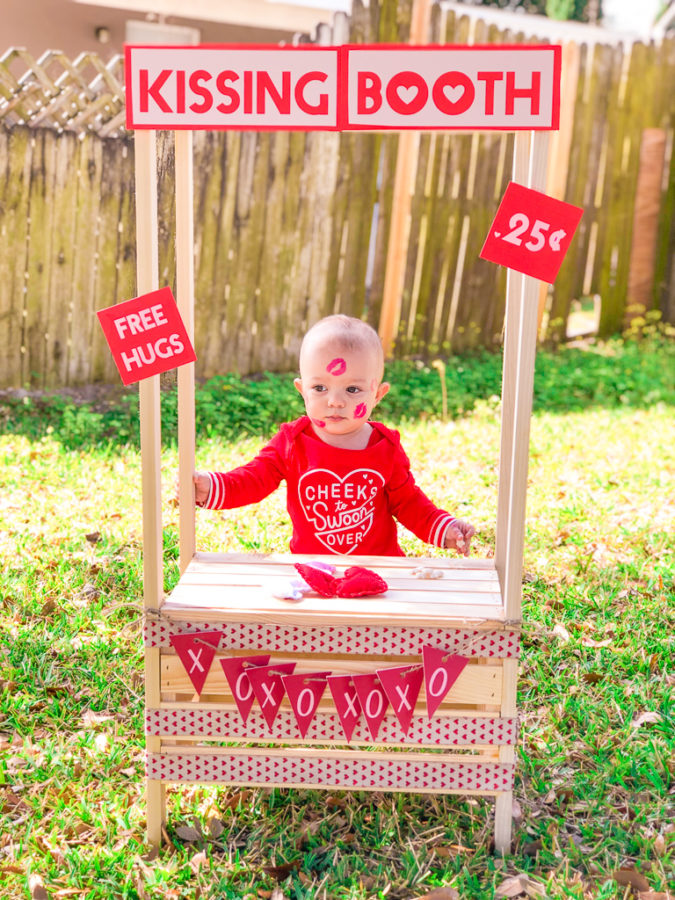
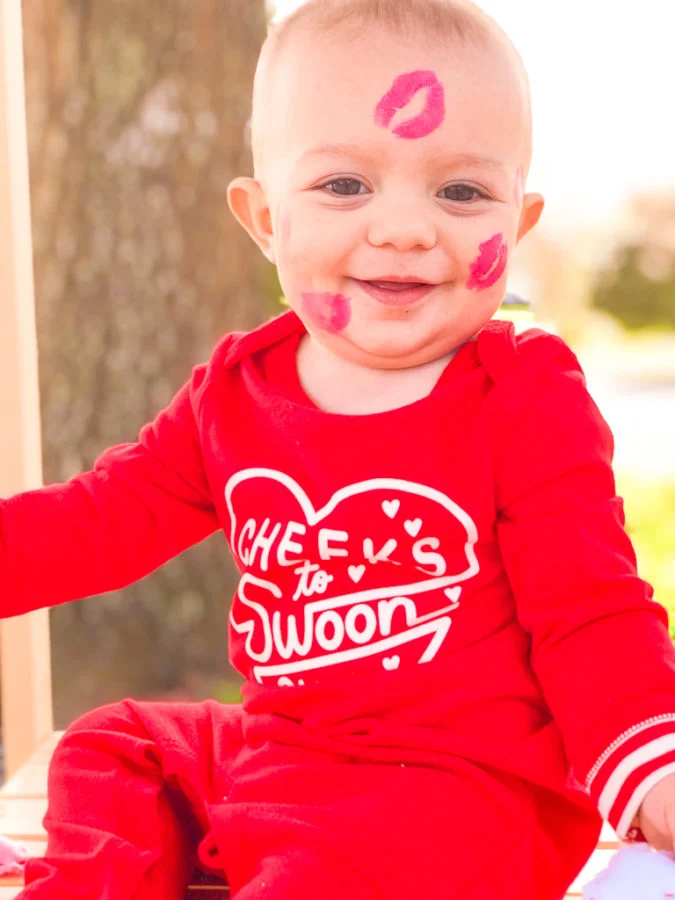
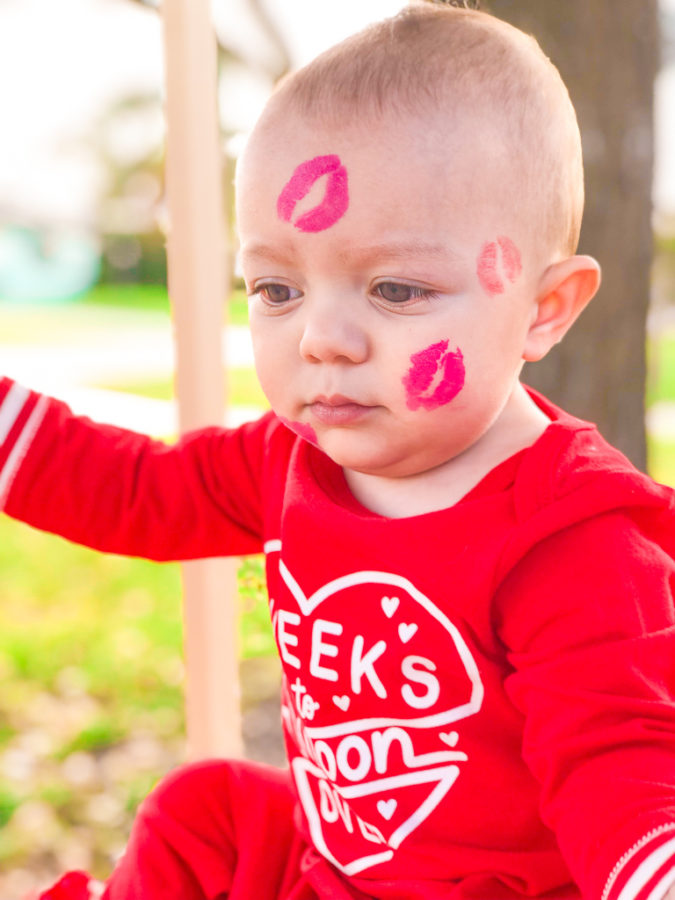
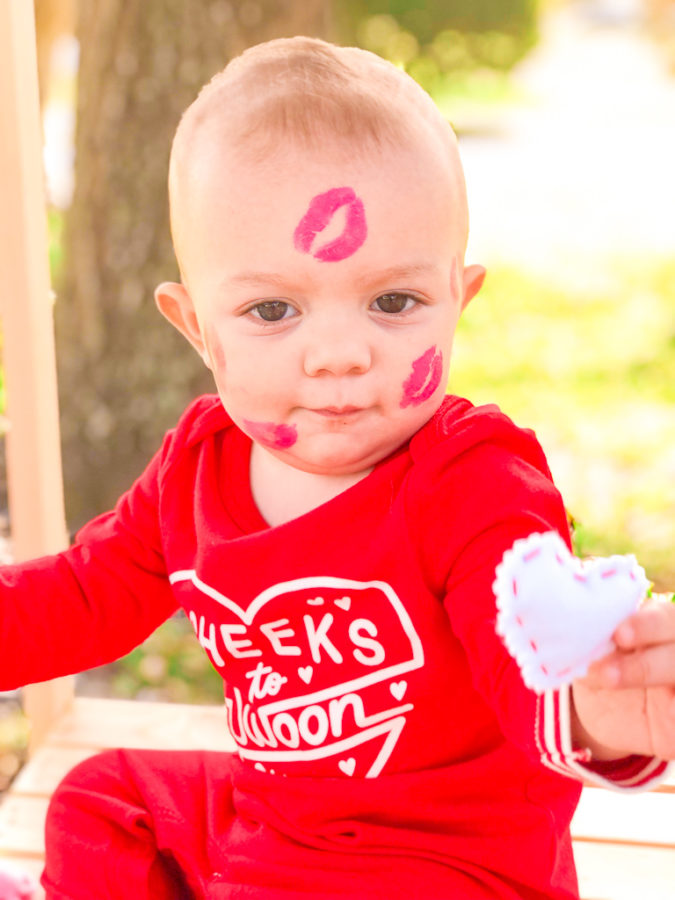
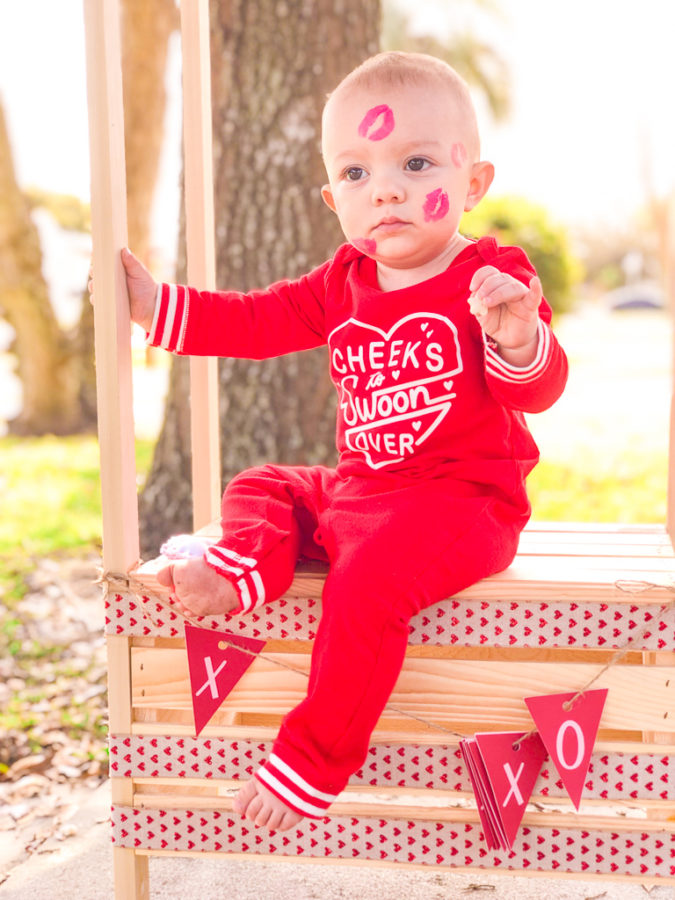
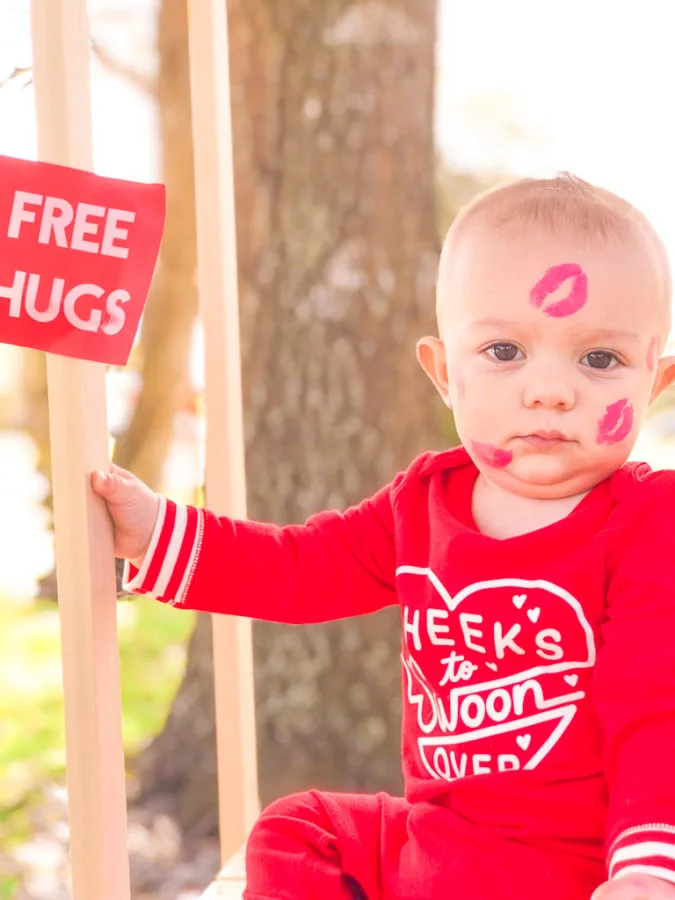
Then, I thought of a Valentine's Day photo I'd seen on Instagram of a baby with kisses all over her body. That photo inspired me to create this DIY Kissing Booth for my little one's Valentine's Day photo.


You see, my son is my muse. Ever since he was born, I've found a deep desire to create fun and unique photos.
Whether I'm creating scenes with rolled up clothing or taking candid photos of my baby boy, it brings an immense amount of joy to my heart. It's my favorite hobby and brings out my creative side.
I get so many comments and questions about the things I create, so I thought it would be fun to share this DIY Cricut project with you. I promise it's so easy that any homemaker could do it.
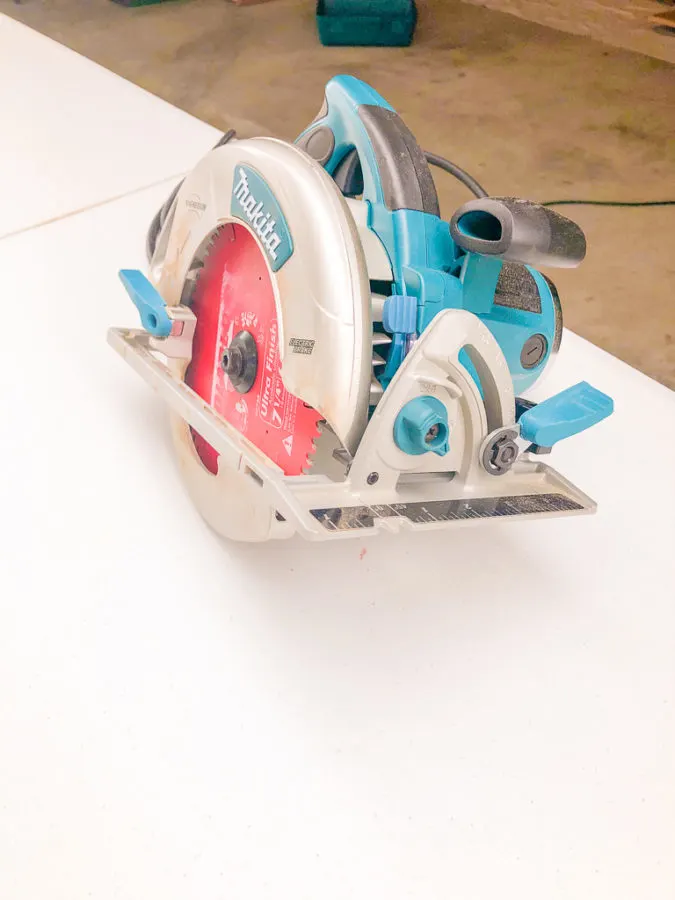
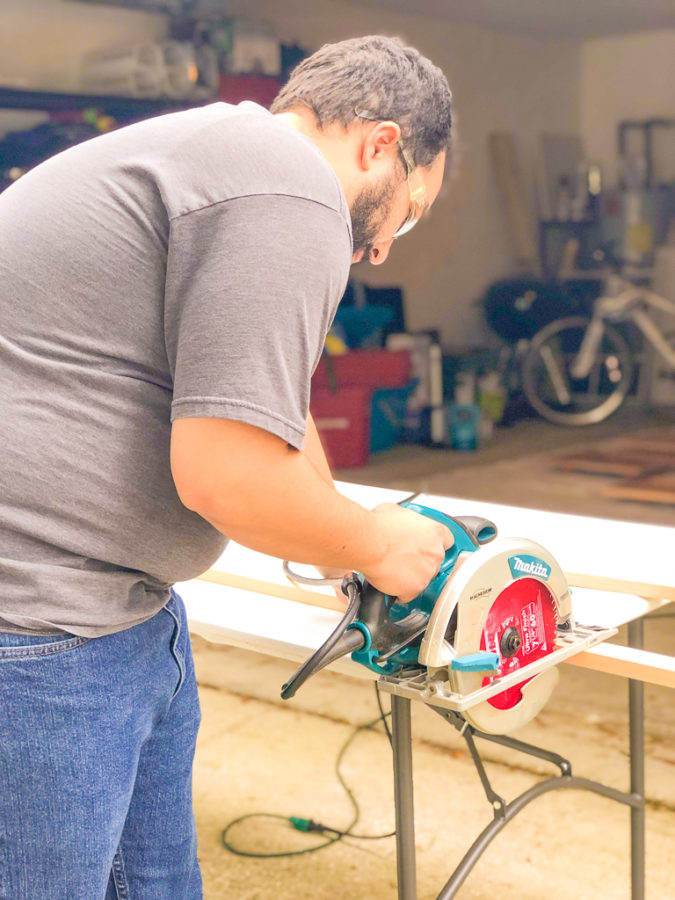
I had some help from my husband who cut the wood for me and basically did all the hard work. Hey, I have no problem with delegating.

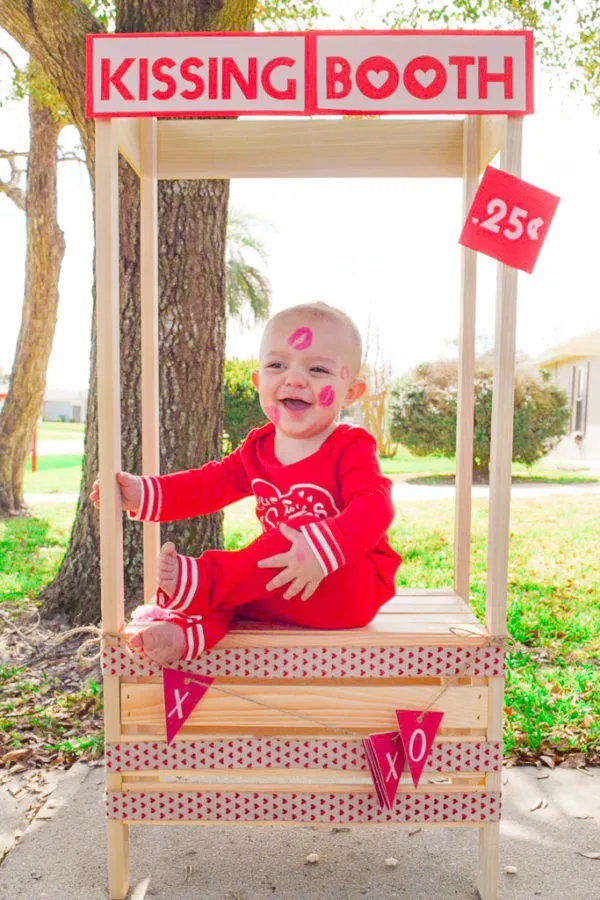
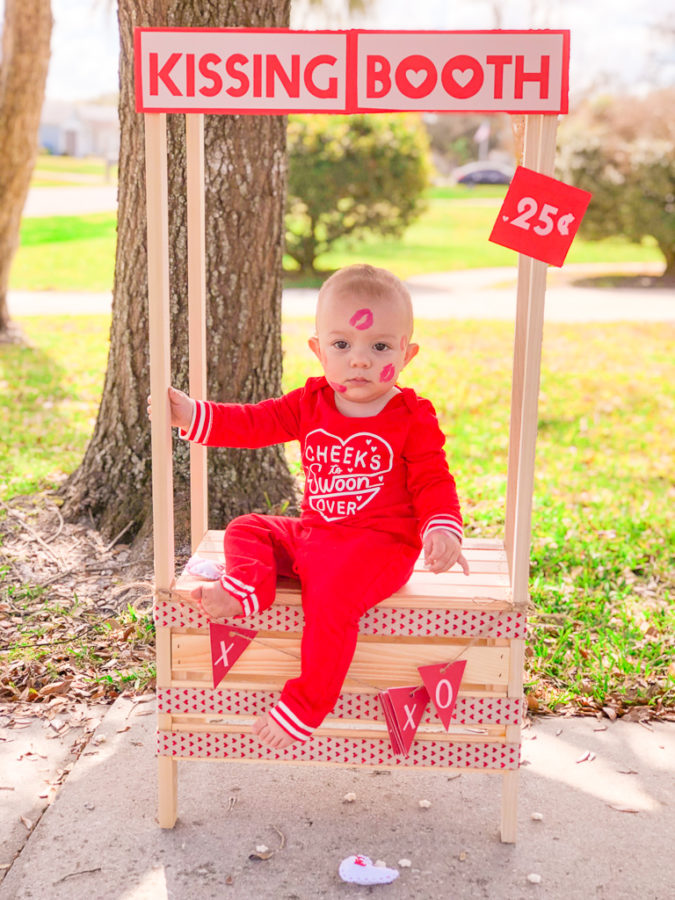


DIY Wooden Kissing Booth
Before I share the tutorial for this Kissing Booth, please keep in mind that my measurements are based on the height of my son.
If you're creating a kissing booth for big kids or adults, you might want to grab a few crate and line them up side by side and stack them! Or you could just build it all from scratch. I don't know your hidden talents.
What You'll Need
- Cricut Joy with Fine Point Blade
- Cricut Cardstock Sampler, Red Tones
- Free SVG Files (Below)
- Cricut Joy StandardGrip Mat
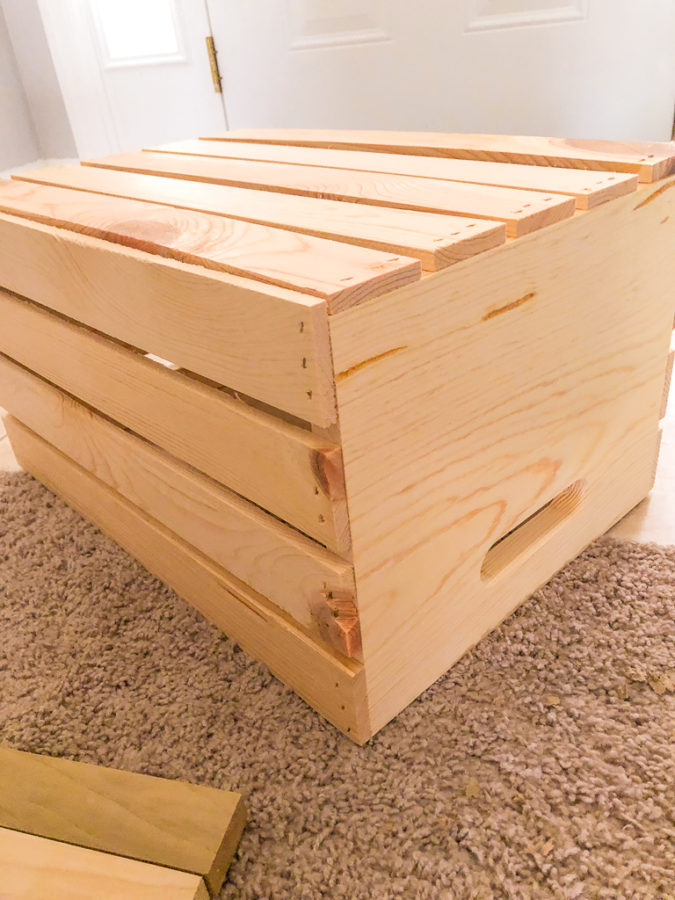
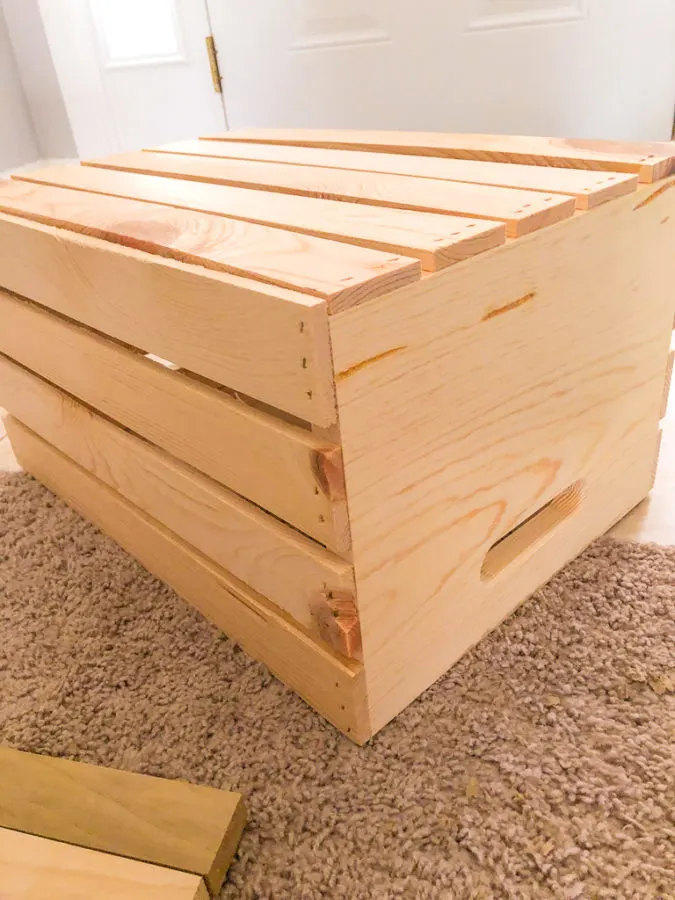
- Unfinished Wood Crate
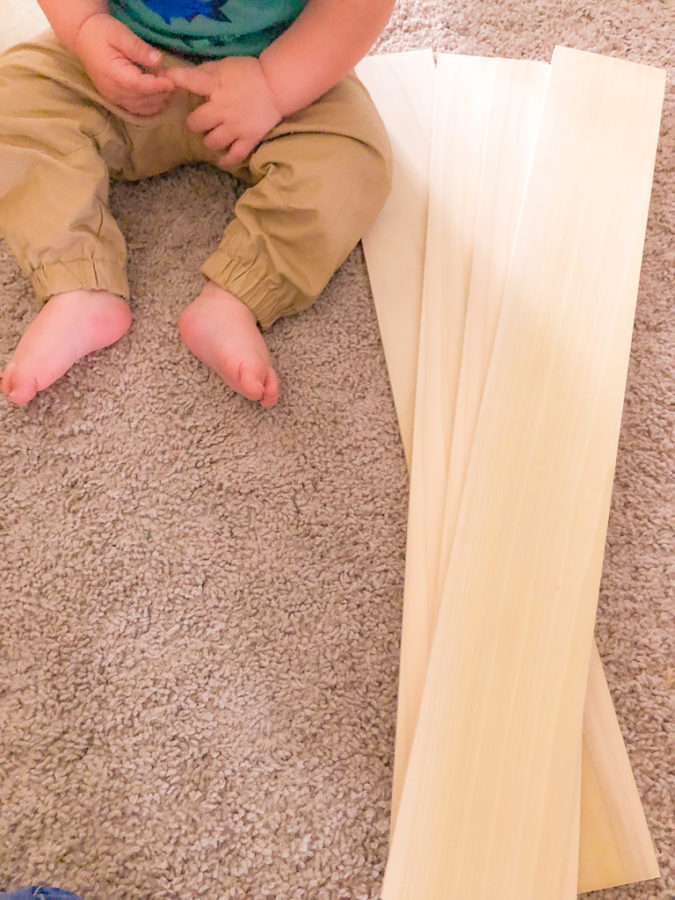
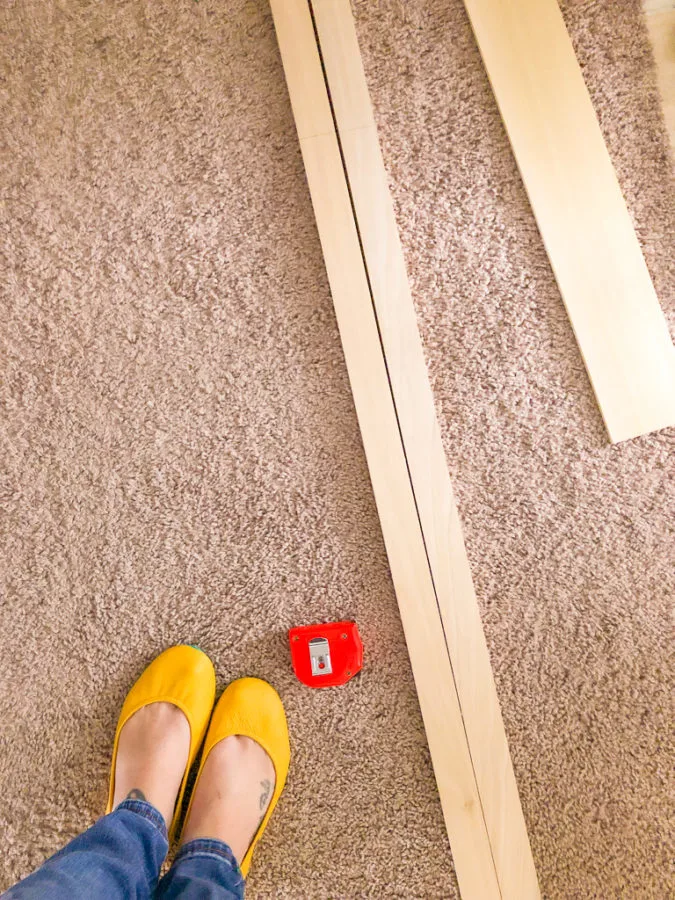
- 4 pieces of wood at about 3ft long, 2 inches wide, and 1 inch thick. It should be sturdy enough to hold the eight of the crate.
- 4 wood planks: (2) 4.5 inches wide, 20 inches long, 1/2 inch thick and (2) 4.5 inches wide, 12 inches long, and 1/2 inch thick
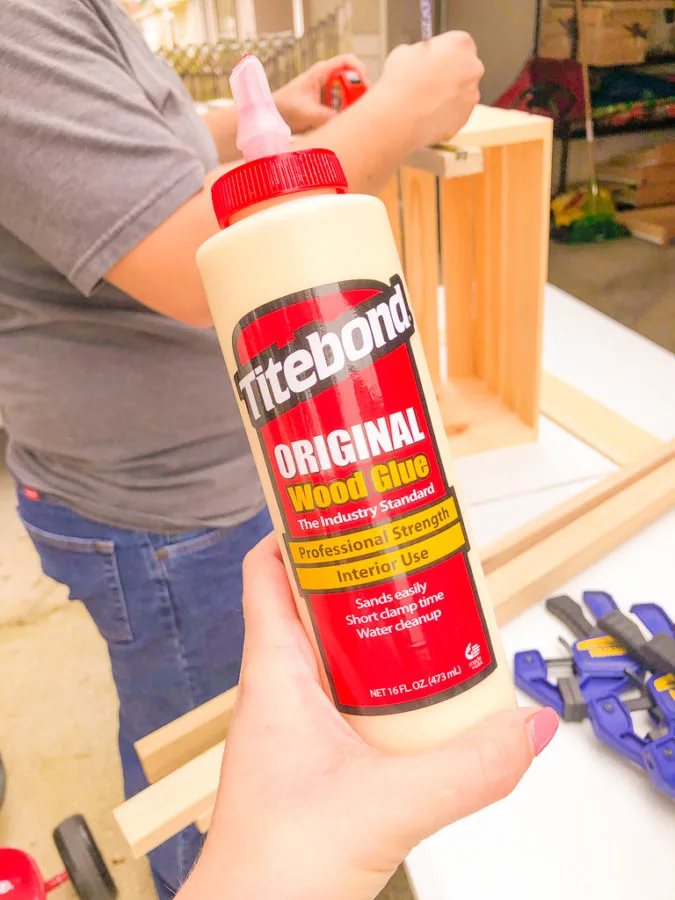
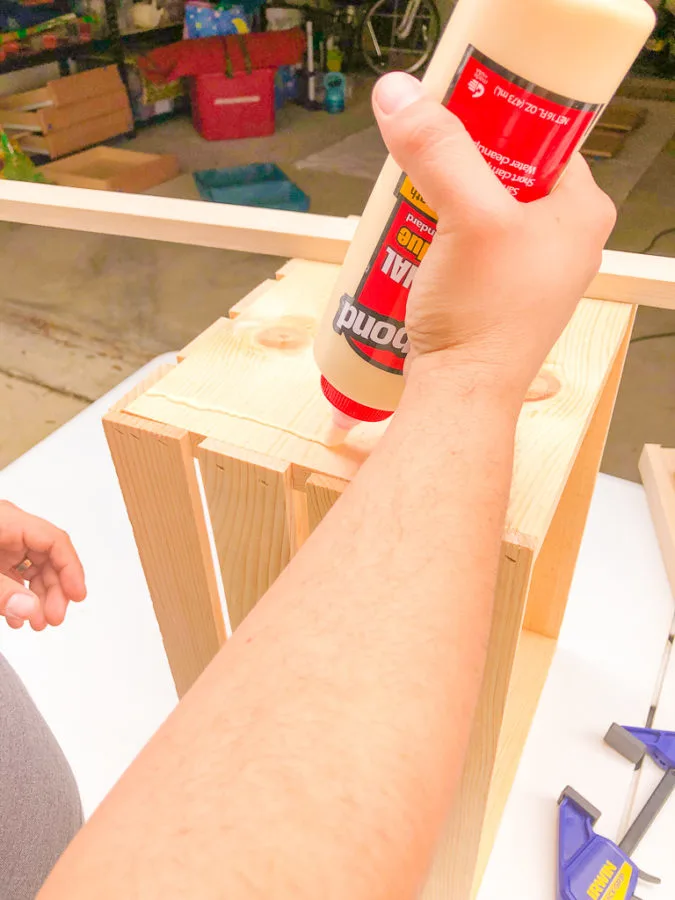
- Wood Glue – We chose to use wood glue because we worried that the crate's wood might be too delicate for nails.
- Bar Clamps – optional but great to hold the wood!


How to Make a Kissing Booth
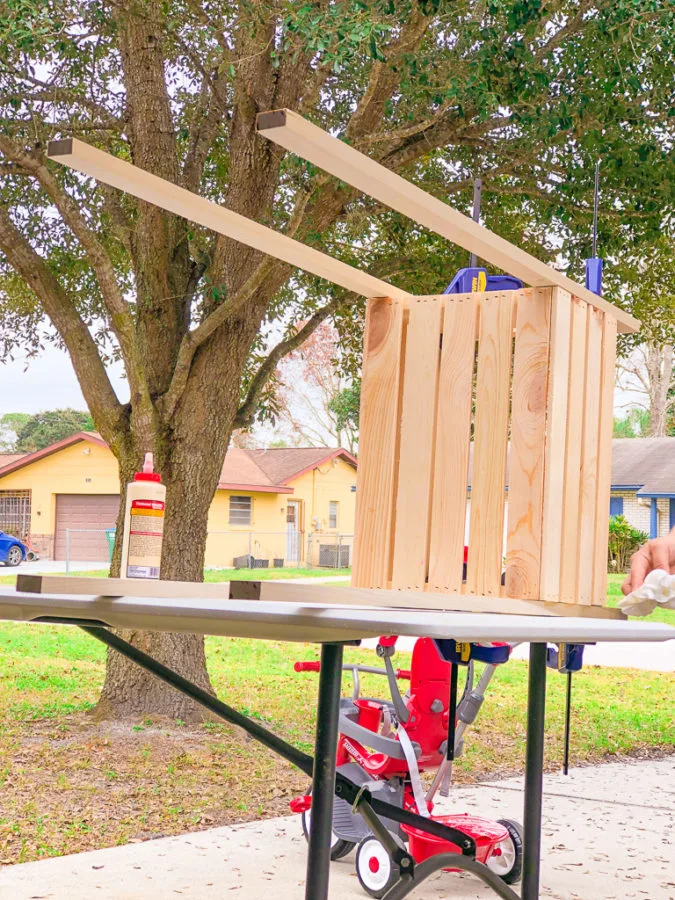
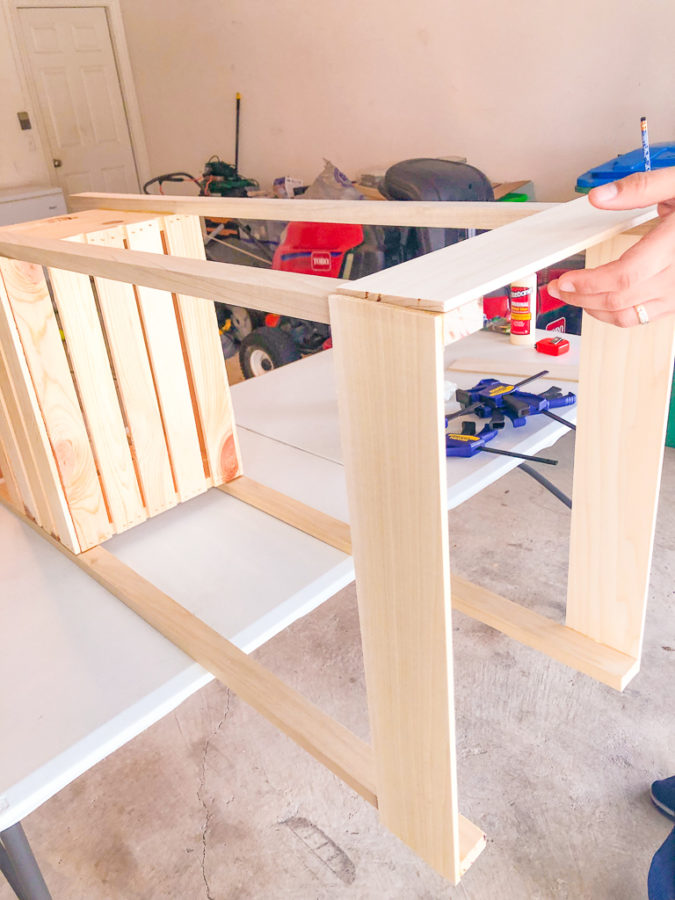
- Flip that crate upside down, so that the bottom will be the top of the booth table.
- Have your child stand as you measure where you'd like the table part of the booth to stand. You'll want it to be at your child's waist so they have lean on the table to stand.
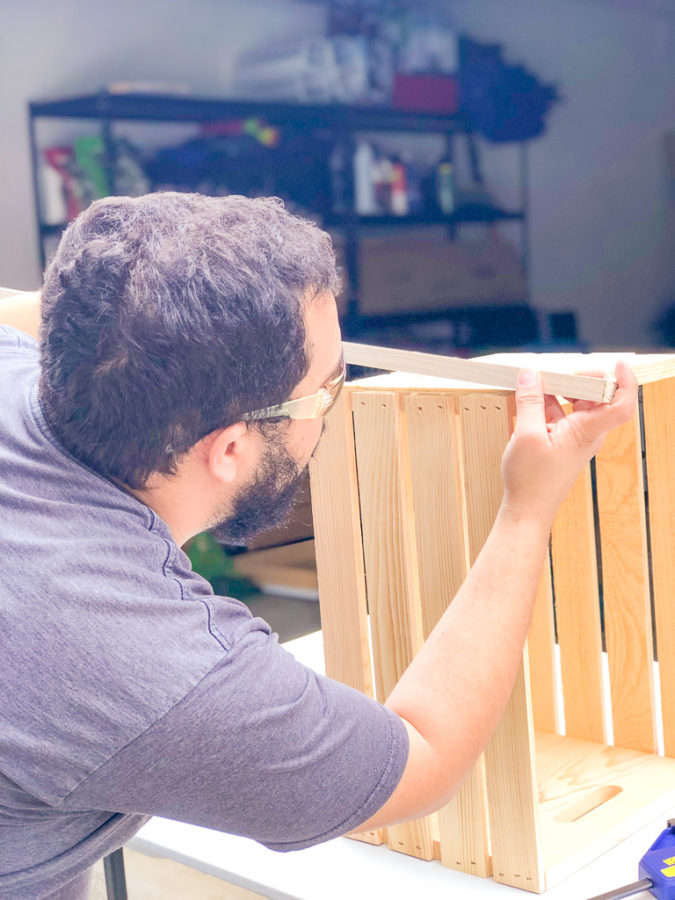
- Mark the 4 pieces of wood with a pencil based on the measurement from step 2. This is where you'll glue the crate. Glue the wood pieces to the left and right sides of the crate. You want these to be flush with the crate. Be sure the longer sides of the crate are in the front/back, as that's what you want to show in the photos.
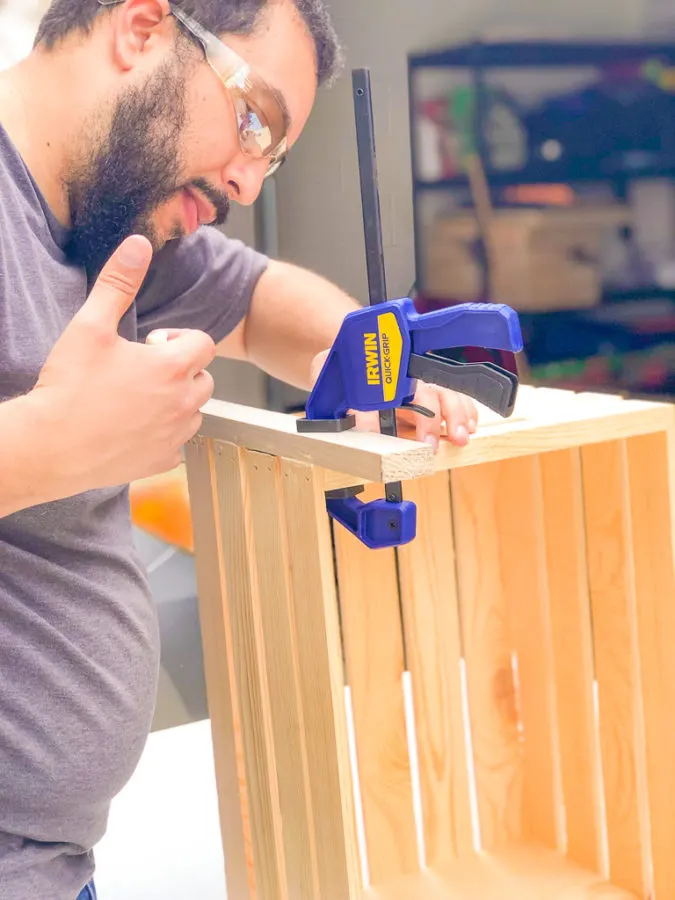
- After gluing all 4 “legs” to the crate, you'll either clamp them (if applicable) or just leave them to dry for an hour or more (check your wood glue for exact timing).
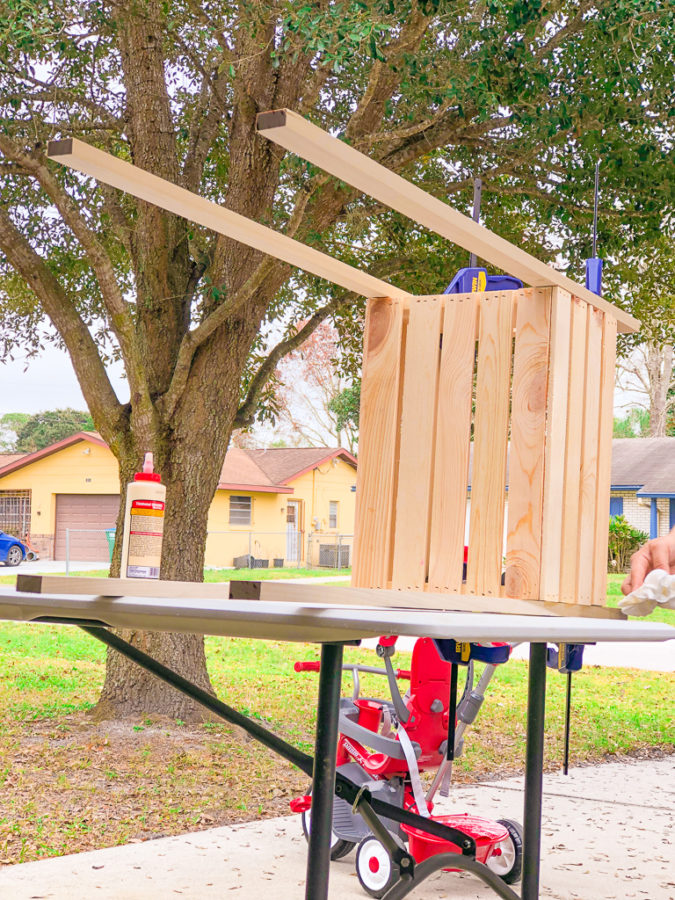
- Next, you're going to glue the wood planks to top of your kissing booth. The longer wood planks will be glued to the front and back and the smaller, to the sides.


That's it! You're all set! Your crate is done and ready to be used as a kissing booth, lemonade stand, or anything else you desire!
DIY Kissing Booth Props
I used my Cricut Joy to cut out all the designs for the DIY Kissing booth and then I finished off the decor with a few felt hearts from the craft store and a clear milk jar for the money! I ended up forgetting the milk jar for my photos. UGH!
How to Make Kissing Booth Props
- Use the kissing booth files below, upload into Cricut Design Space.
- Size as needed.
- Place your Red Tones Cricut Paper on the StandardGrip mat and run it into the Cricut machine.
- Choose the 80lb Cardstock setting and cut your files!
- Use your adhesive of choice to assemble the kissing booth props.
- I used double sided tape to hang the signs, so I can remove them afterward.
- I also cut and placed strips of ribbon across the bottom of the booth, applying it with double sided tape.


Kissing Booth Cut Files:
- XOXO Wreath cut file – I used two different colors of scrapbook paper, cut the empty banners in one color, and the XOXO banners in the other color, then glued them together. Finally, I added twine and tied around the arms of the booth.
- “Kissing Booth”, “.25¢”, and “Free Hugs” cut file – I used the same technique as above but I switched up the colors a little bit.
Now, dress your little one in something sweet, and kiss him/her with red and pink lips! Take 100 photos until you find the perfect one! Have fun!
Please tag me on Instagram @ButFirstJoy if you create your own Kissing Booth or Photo Booth using my tutorial. You can even paint yours, use it for party fun, or as a simple prop for photos as I'm doing. I hope you love it as much as I do!
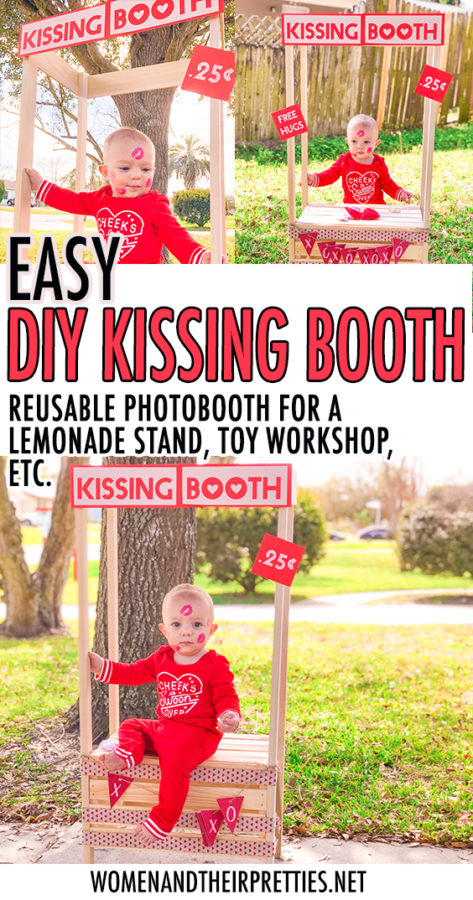

I hope you learned how to make a kissing booth today! I really hope that you share your baby kissing booth if you made one. Isn't this so much better than the typical cardboard kissing booth? It can be reused for so many things!
… [Trackback]
[…] Here you can find 65549 more Info on that Topic: butfirstjoy.com/diy-kissing-booth-photo-booth/ […]
… [Trackback]
[…] There you can find 8348 additional Information to that Topic: butfirstjoy.com/diy-kissing-booth-photo-booth/ […]
… [Trackback]
[…] Find More here to that Topic: butfirstjoy.com/diy-kissing-booth-photo-booth/ […]
… [Trackback]
[…] Find More to that Topic: butfirstjoy.com/diy-kissing-booth-photo-booth/ […]
… [Trackback]
[…] Read More here to that Topic: butfirstjoy.com/diy-kissing-booth-photo-booth/ […]
… [Trackback]
[…] Read More on that Topic: butfirstjoy.com/diy-kissing-booth-photo-booth/ […]
… [Trackback]
[…] Find More here on that Topic: butfirstjoy.com/diy-kissing-booth-photo-booth/ […]
… [Trackback]
[…] Read More to that Topic: butfirstjoy.com/diy-kissing-booth-photo-booth/ […]
… [Trackback]
[…] Find More Info here to that Topic: butfirstjoy.com/diy-kissing-booth-photo-booth/ […]
… [Trackback]
[…] Find More on on that Topic: butfirstjoy.com/diy-kissing-booth-photo-booth/ […]
… [Trackback]
[…] Find More to that Topic: butfirstjoy.com/diy-kissing-booth-photo-booth/ […]
… [Trackback]
[…] Find More Information here on that Topic: butfirstjoy.com/diy-kissing-booth-photo-booth/ […]
… [Trackback]
[…] Find More Information here on that Topic: butfirstjoy.com/diy-kissing-booth-photo-booth/ […]
… [Trackback]
[…] Find More on that Topic: butfirstjoy.com/diy-kissing-booth-photo-booth/ […]
… [Trackback]
[…] Read More Information here on that Topic: butfirstjoy.com/diy-kissing-booth-photo-booth/ […]
… [Trackback]
[…] Here you will find 79825 more Information to that Topic: butfirstjoy.com/diy-kissing-booth-photo-booth/ […]
… [Trackback]
[…] Info to that Topic: butfirstjoy.com/diy-kissing-booth-photo-booth/ […]
… [Trackback]
[…] Information on that Topic: butfirstjoy.com/diy-kissing-booth-photo-booth/ […]
… [Trackback]
[…] There you will find 27923 additional Info on that Topic: butfirstjoy.com/diy-kissing-booth-photo-booth/ […]
… [Trackback]
[…] Read More on that Topic: butfirstjoy.com/diy-kissing-booth-photo-booth/ […]
… [Trackback]
[…] Find More here to that Topic: butfirstjoy.com/diy-kissing-booth-photo-booth/ […]
… [Trackback]
[…] Here you will find 2229 more Info on that Topic: butfirstjoy.com/diy-kissing-booth-photo-booth/ […]