
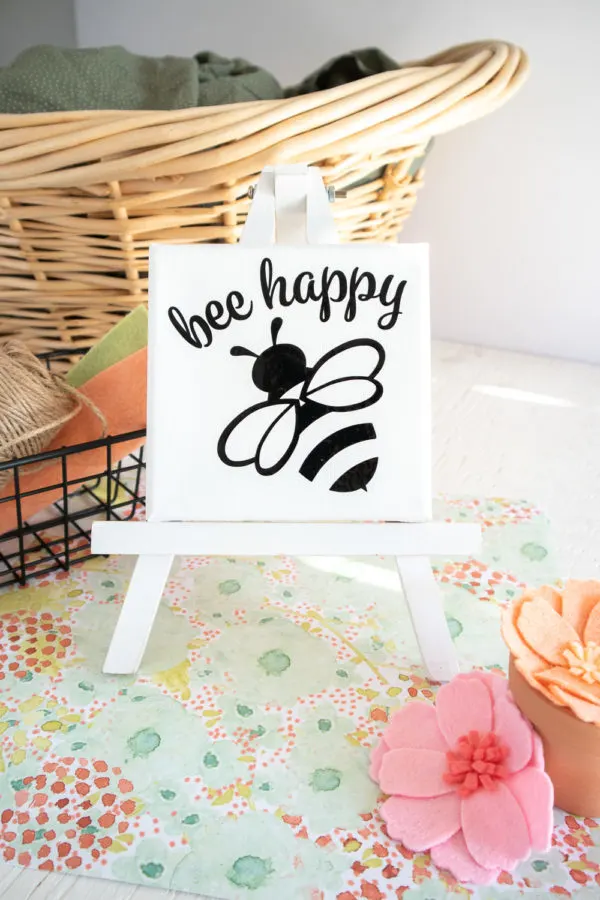
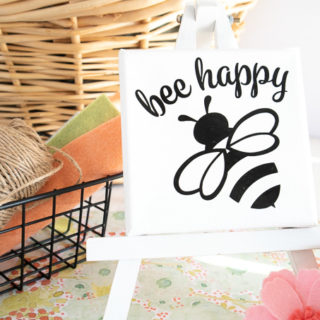
Save yourself some money on decor this Spring and dive into making your very own DIY “Bee Happy” Canvas with Cricut Joy.
If you have been staring at your Cricut Joy for a while and weren't sure how to get started, this is your chance. When I was putting this tutorial together, I wanted it to be perfect! I wanted to show you how easy it is to do things like this right in your own home.

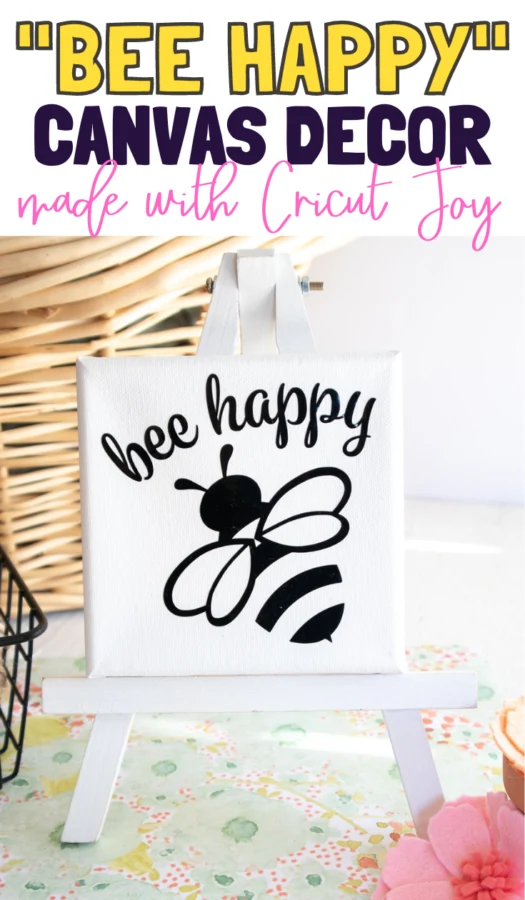
“Bee Happy” Canvas
There is nothing that I enjoy more than looking at my own home decor and knowing I helped put it all together. Not only this canvas great to hang around your home, but you can also make it to gift to other people. It will make you smile when you walk into their home and see that beautiful canvas hanging up.


Why Make Your Own “Bee Happy” Canvas?
Of course, you can always buy your own decor items, but there is always so much satisfaction in making your own. Take a whole day and dive into “creating” with your Cricut Joy. Once you get started, you may even be amazed at how easy it is to make it!
This tutorial is just a gateway to you creating more projects on your own. Using a few materials, you'll have this adorable canvas hanging in your house in no time.

Endless Possibilities with a Cricut Joy
You may be wondering what other kinds of projects you can do with a Cricut Joy. You can literally put your very own personal touch on just about anything you want to make. The possibilities are endless from home decor to decals to homemade cards. Although small, this machine is still very mighty!
The next time you are looking for something to make, give this “Bee Happy” Canvas a try. It is one DIY project you can do with your Cricut Joy and have a ton of fun doing. If you decide to complete this tutorial let me know by leaving a comment below.

Bee Happy Canvas (Cricut Joy Tutorial)
If you are interested in making your own Bee Happy Canvas, then you have come to the right place. This tutorial will walk you through exactly how to do it!
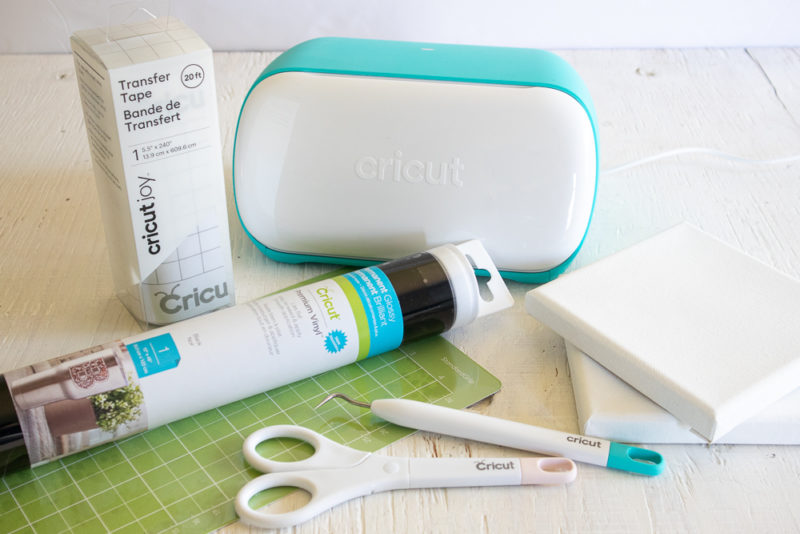
Materials
Instructions
Instructions:
1. Gather supplies.
Preparing the Image:
1. Open Cricut Design Space.
2. Click on the “+” sign to start a new project, opening up a blank canvas.
3. Click on the “Upload” button from the toolbar and browse your downloaded files to insert the SVG file.
4. The cut image will appear on the canvas.
5. With the image selected, click on the “Weld” button to secure all parts of the image together for cutting.
6. Maintain the size or adjust to fit your canvas. To adjust the size, highlight the image and click on the size box in the top toolbar. Change the measurement to suit your canvas size accordingly.
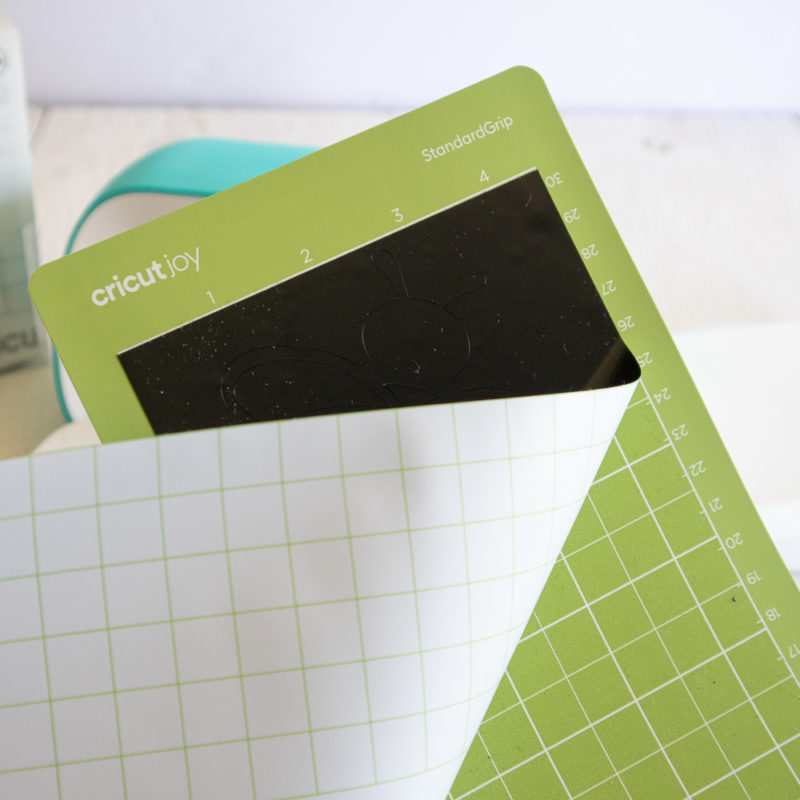
Cutting the Permanent Smart Vinyl:
7. Select “Make It” in the upper right corner to proceed with cutting.
8. If using Cricut Premium Vinyl, choose “mat” for cutting.
9. Note the size of the Premium Vinyl needed and cut the length of the vinyl accordingly. In this case, cut the vinyl to 6.5” long.
10. Choose the Premium Vinyl, Permanent from the list of options in the drop down menu.
Following the instructions prompted on the screen, cut out the vinyl.
How to Assemble the Canvas:
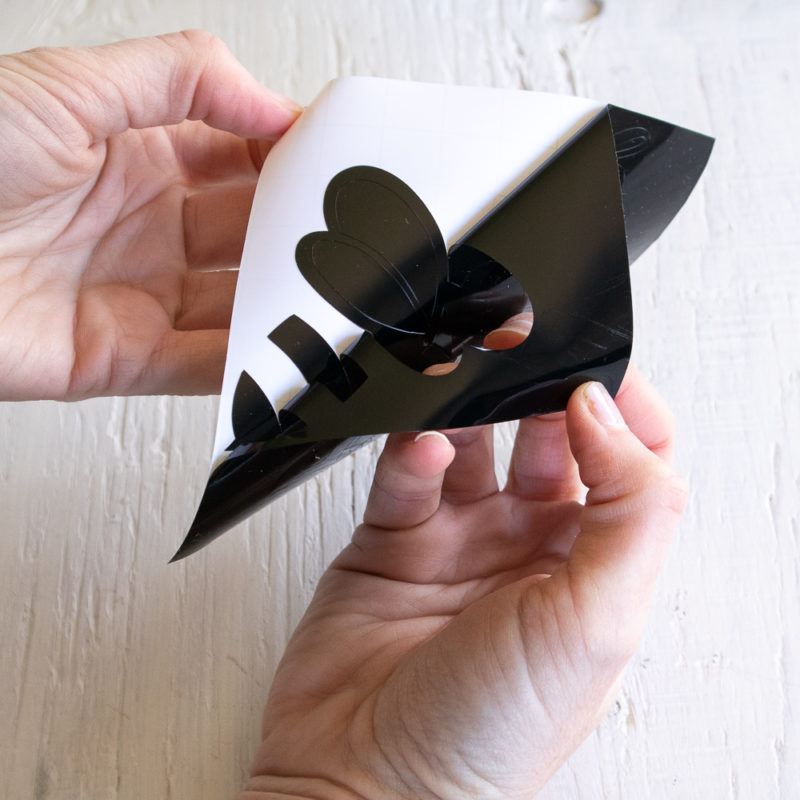
11. Cut around the image with a pair of scissors.
12. Using the weeding tool, peel away the excess vinyl around the cut images and discard.
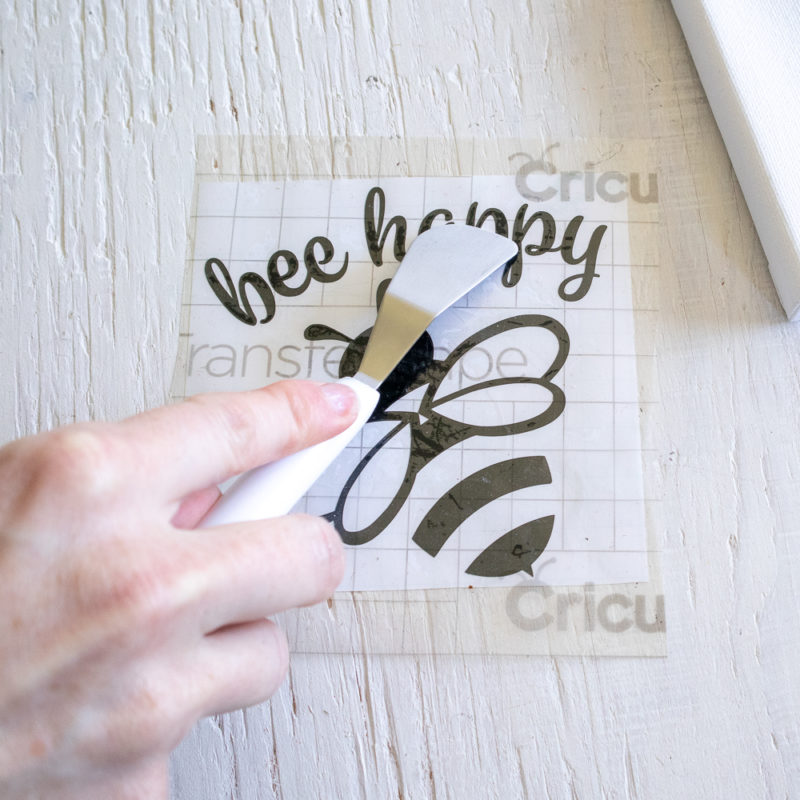
13. Cut a piece of transfer tape a bit larger than the size of the image.
14. Peel away the transfer tape backing and place the transfer tape overtop of the cut image. Gently rub the vinyl to help it stick to the transfer tape.
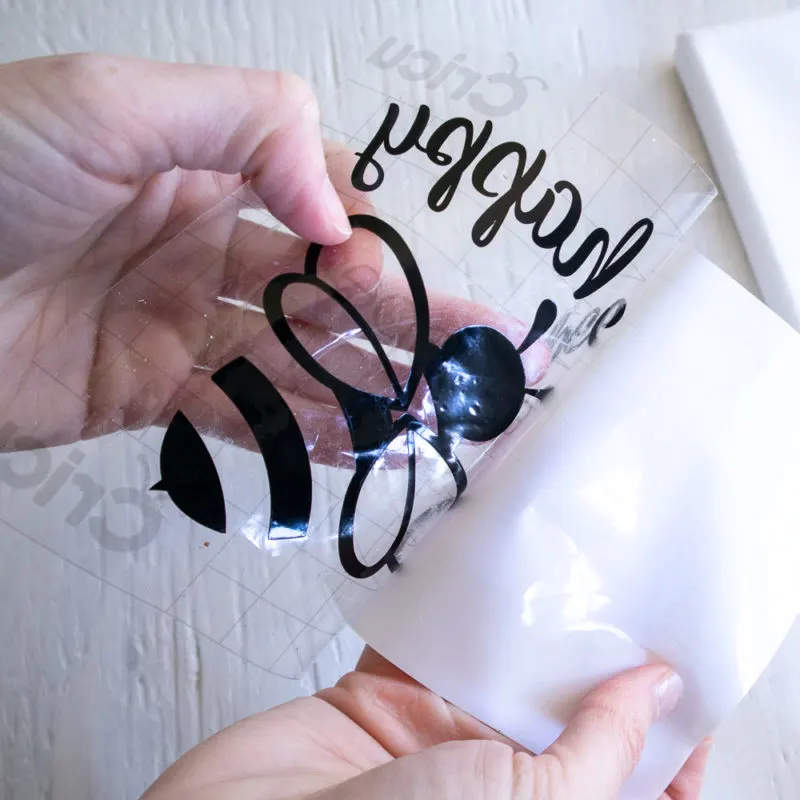
15. Peel away the vinyl backing, leaving just the image adhered to the transfer tape.
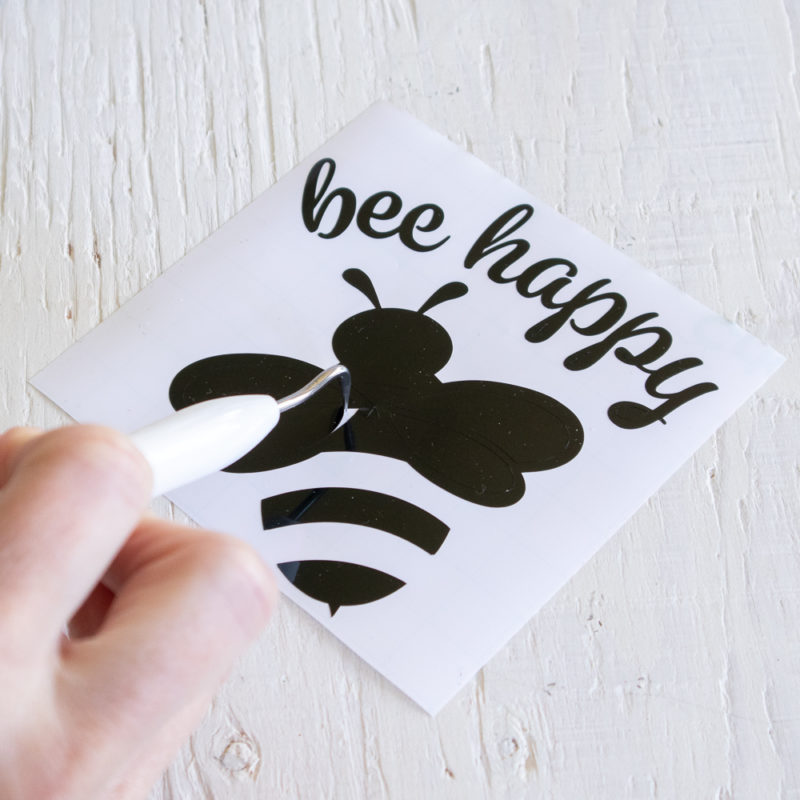
16. Position the image with the transfer tape on to the canvas and press in place.
17. Using the Cricut scraping tool, scrape the image onto the canvas on both sides to help it to stick to the canvas.
18. Slowly and carefully remove the transfer tape leaving the vinyl image on the canvas. Wiggle the transfer tape while peeling to help release it from the Premium Vinyl image.
… [Trackback]
[…] Here you can find 17980 additional Information to that Topic: butfirstjoy.com/diy-bee-happy-canvas-cricut-joy/ […]
It’s a privilege to share this miraculous testimony to the world. My name is Marianella Cordero, My husband divorced me 8 months back and I have been filled with remorse for I didn’t know what to do to amend issues with my husband. I searched for help on the internet on how I could get help in my marriage and I discovered great testifiers about DR JOHN SOCO who has been progressive with his spells. I got in touch with him and behold, DR JOHN SOCO, told me that he will prepare a spell for me that will bring back my husband. I was skeptical but I had no other option but to work with him. 3 days later, my husband called me that he’s coming back home and from that day till this moment, we have been living peacefully. He is back now with so much love and caring. today i am glad to let you all know that this spell caster has the power to bring lovers back and the most surprising thing is that our love is very strong now, every day is happiness and joy. and There is nothing like being with the man you love. I will highly recommend DR JOHN SOCO to anyone one out there who needs help whatsoever. If you have any problem contact DR JOHN SOCO, i give you 100% guarantee that he will help you!!. On whatsApp number: +1 706 871 4571 ..
It’s a privilege to share this miraculous testimony to the world. My name is Marianella Cordero, My husband divorced me 8 months back and I have been filled with remorse for I didn’t know what to do to amend issues with my husband. I searched for help on the internet on how I could get help in my marriage and I discovered great testifiers about DR JOHN SOCO who has been progressive with his spells. I got in touch with him and behold, DR JOHN SOCO, told me that he will prepare a spell for me that will bring back my husband. I was skeptical but I had no other option but to work with him. 3 days later, my husband called me that he’s coming back home and from that day till this moment, we have been living peacefully. He is back now with so much love and caring. today i am glad to let you all know that this spell caster has the power to bring lovers back and the most surprising thing is that our love is very strong now, every day is happiness and joy. and There is nothing like being with the man you love. I will highly recommend DR JOHN SOCO to anyone one out there who needs help whatsoever. If you have any problem contact DR JOHN SOCO, i give you 100% guarantee that he will help you!!. Email: Drjohnsoco @ gmail. com or whatsApp number: +1 706 871 4571 ..