
This is a sponsored post written by me on behalf of Cricut. All opinions are 100% mine.
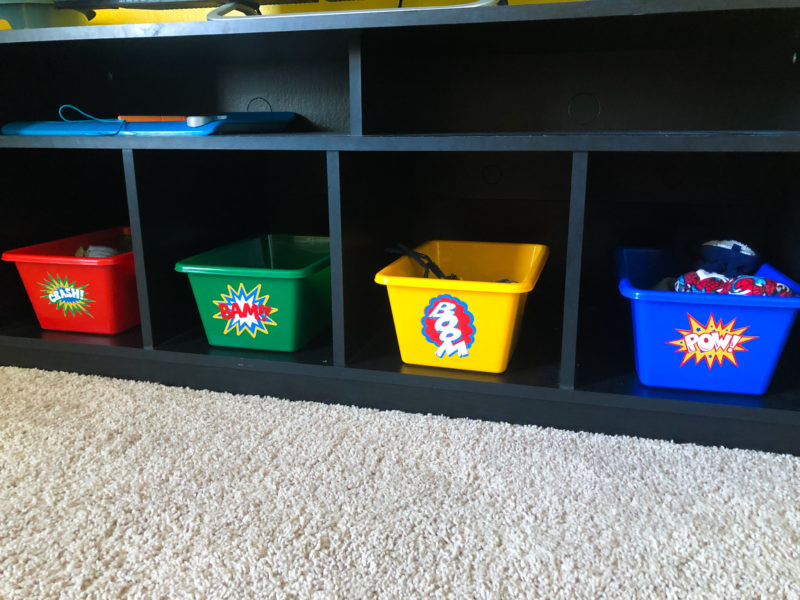
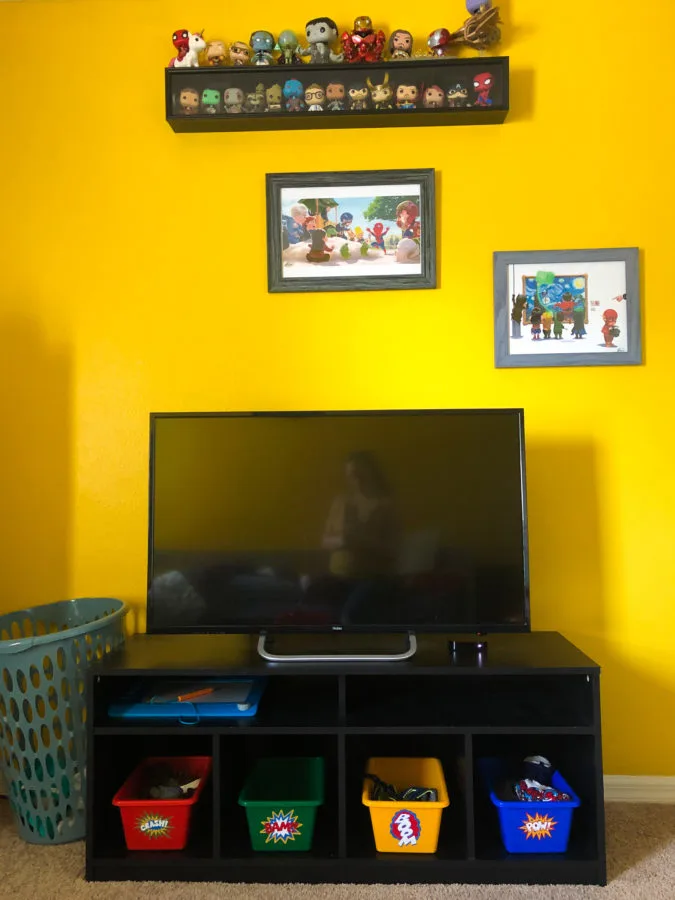
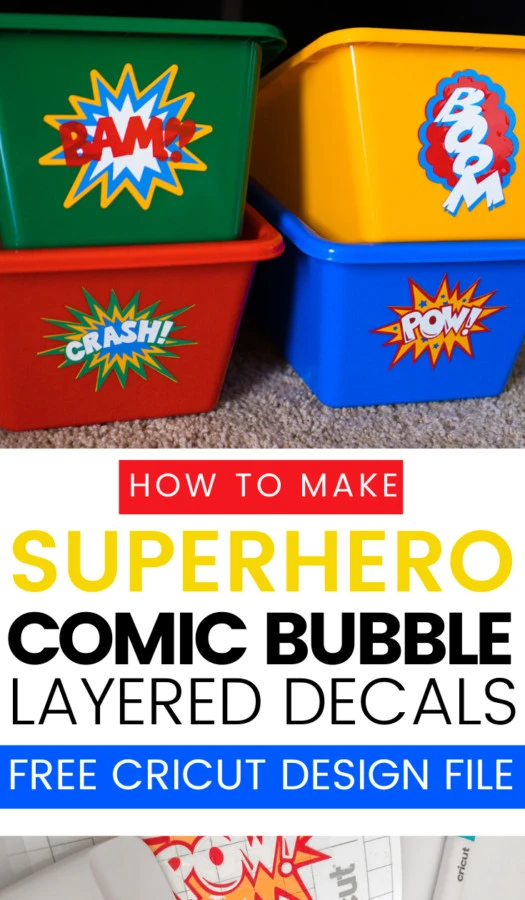
I used my Cricut Joy to make the cutest superhero comic bubble vinyl decals. This easy Cricut vinyl project is perfect for a themed superhero room or party.
To make these fun Superhero Comic Bubbles, you'll first need to access my Cricut Design Space project. If you aren't already a member of Cricut Design Space, make your free account now. I personally recommend subscribing to Cricut Access for unlimited use of the thousands of free fonts & designs.

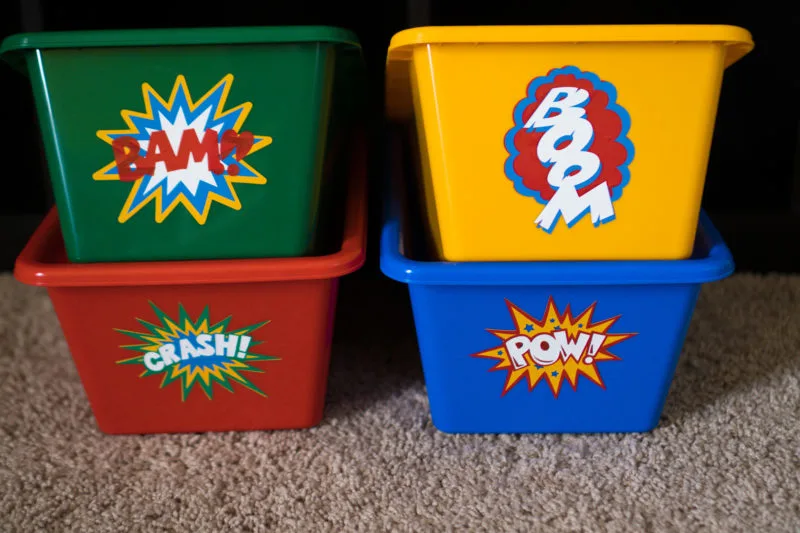
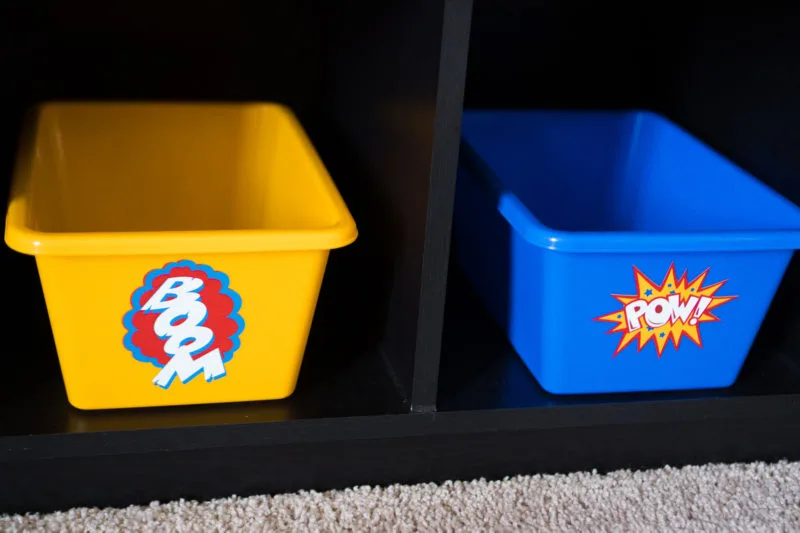
In this project, you'll notice I have 4 different comic bubbles. I used a few of the premade designs I found on Cricut Access and made the 4th. I needed four decals for my son's cute little storage bins.
Each decal can be cut, weeded, and layered in under 10 minutes making this an easy Cricut Joy home improvement project.
Superhero Comic Bubble Vinyl Decals
These superhero comic bubble vinyl decals are extra special because I took the time to slice each design for layering with multiple colors. In the beginning, I tried layering each design on top of one another and, like an amateur, I realized this creates way too much bubbling.

Layering permanent vinyl can be quite intimidating because you get it right or you don't. To ensure your decals come out just right, you'll notice the Cricut Design Space project includes extra little squares. These make aligning each layer much easier.

Now, I'll admit that I don't have the most steady hand. I prefer working with either one layer or sticking to my favorite Cricut material: Infusible Ink Transfer Sheets. However, I wanted to make something extra special to take my son's superhero room to the next level!

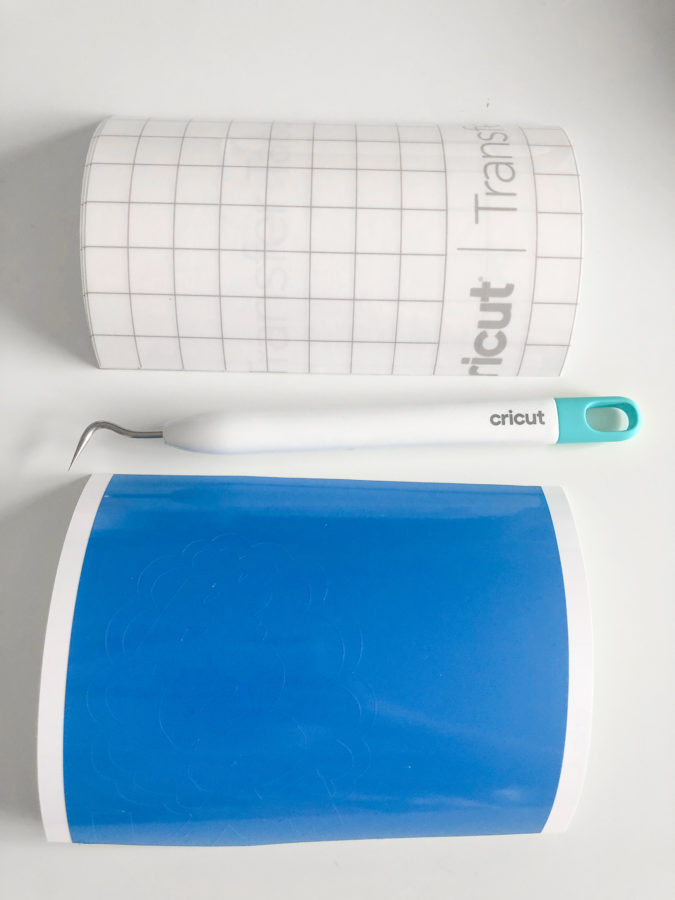
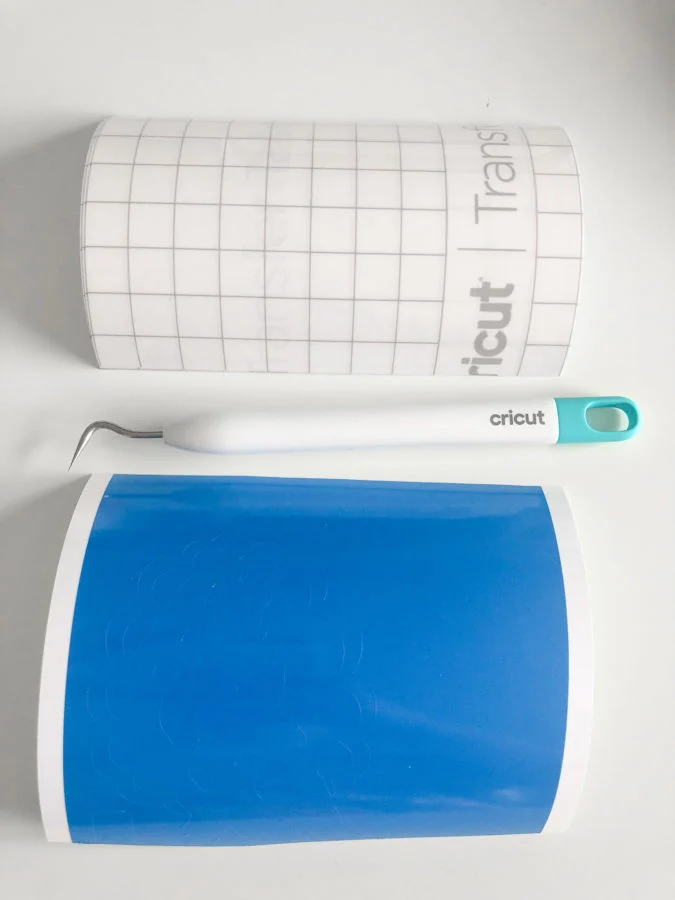
Supplies Needed
- Superhero Comic Bubbles Vinyl Decals – Design Space File
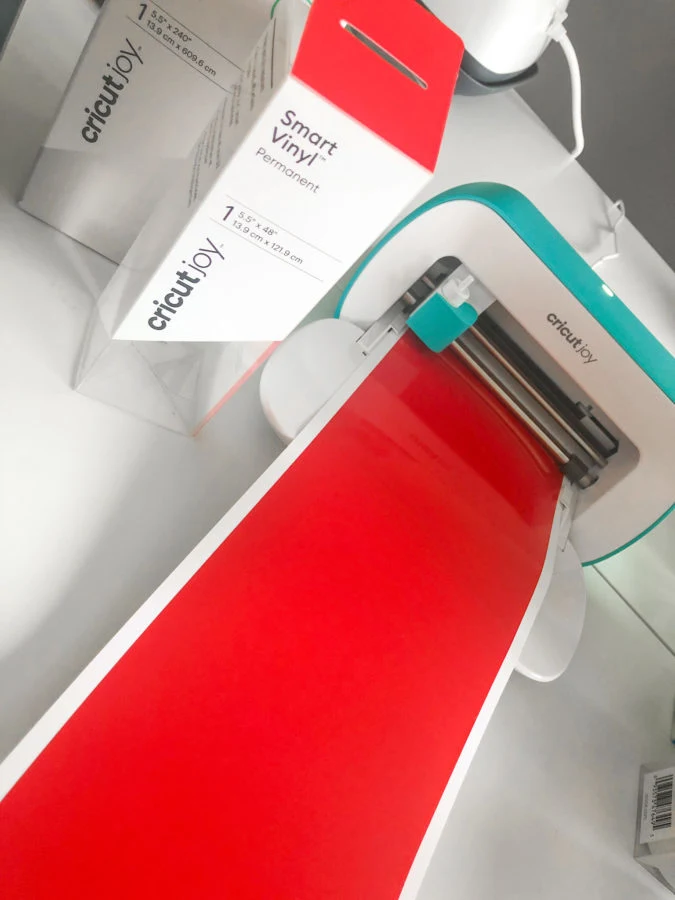
- Cricut Joy (or other Cricut cutting machine)
- Fine Point Blade
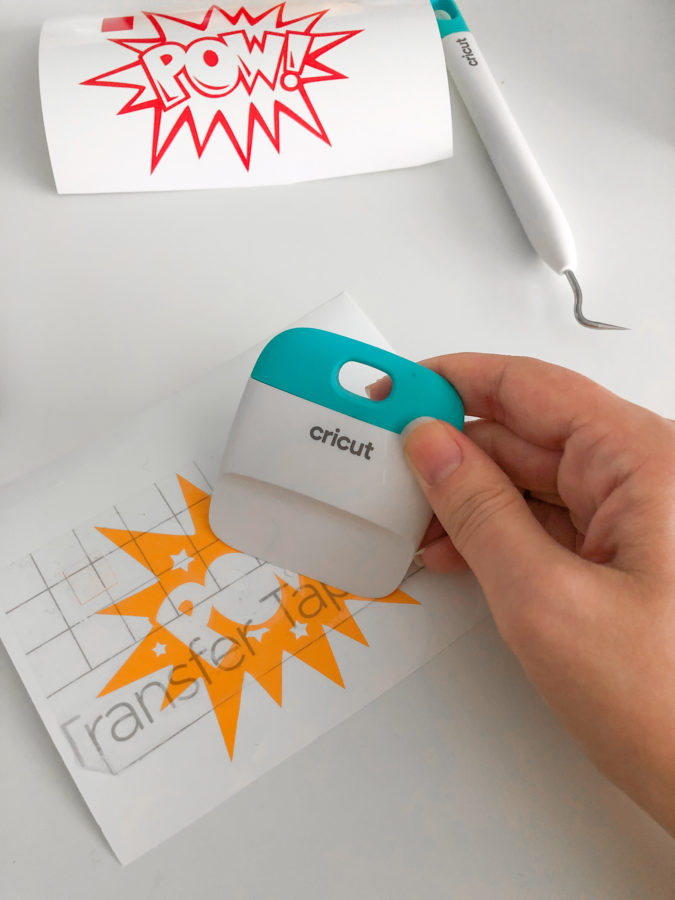
- Cricut Joy Starter Tool Set (this project uses the Weeder and Scraper)
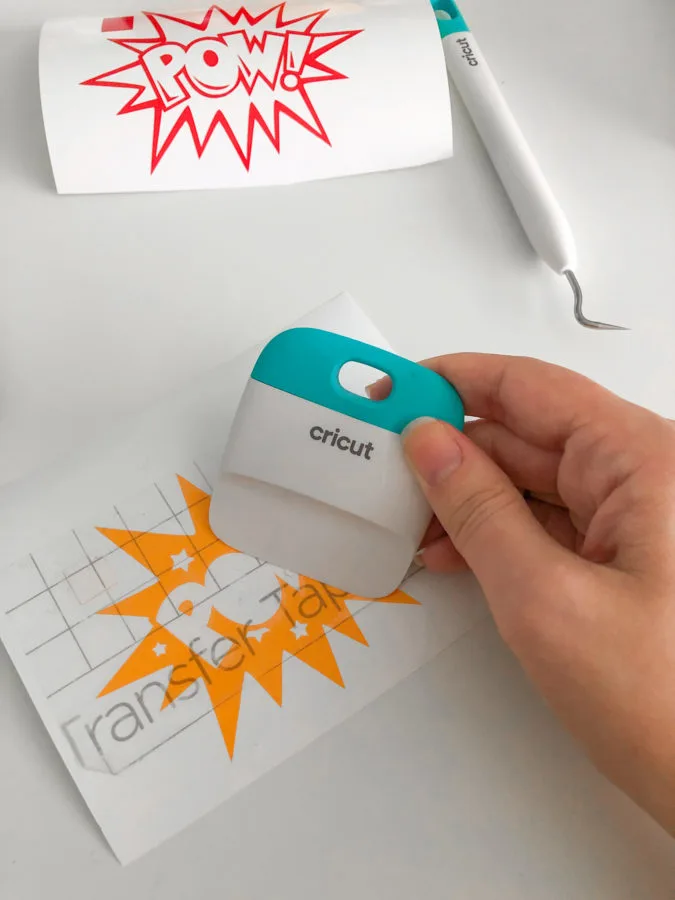
- Cricut Transfer Tape
- Scissors
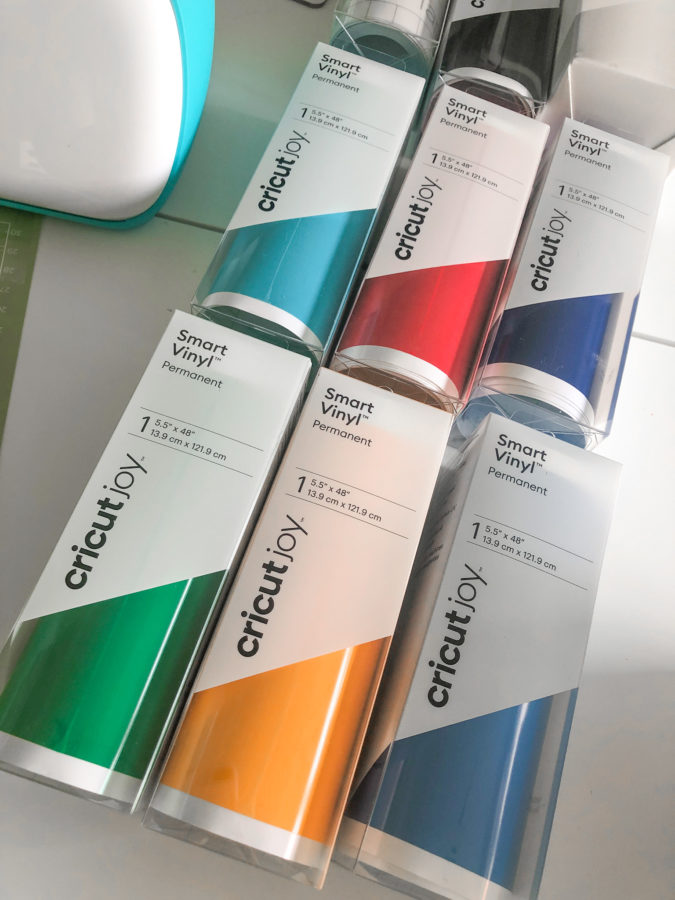
- Cricut Joy Smart Permanent Vinyl (see colors I used below)
– White
– Tomato Red
– Kelly Green
– Tangerine
– Medium Blue
– Other colors that would be nice with this project: Tennis Ball, Lime Green, Black, Orange - Colorful Storage Bins
Preparing the Cricut Design Space project
1. Open the project in Design Space – click customize.
2. In the customize screen, change design layers to the colors of your choice or leave them as is if you have the same colors as I used.
IMPORTANT: Be sure to change each attached square to the color, as well. This will ensure that the square prints along with the layer which is important for aligning vinyl layers.
3. I highly recommend cutting each design individually. To do so, you will hide the groups, leaving only the one you'd like to cut.
Hide a group by clicking the eye next to the word group. I recommend collapsing all groups before doing so.
4. Click “Make It” in the top right corner.
5. Choose “Without Mat” because this is Cricut Smart Vinyl so no backing is needed.
6. Choose the Cricut Smart Vinyl – Permanent.

7. Now, you'll load your Cricut Joy Smart vinyl colors into the machine (as directed by design space), according to each layer and cut the.
8. While the decal layers are cutting, you can use scissors to cut a few pieces of transfer tape to prepare them for each layer.
9. When the design has completed, click Finish and go back to the Design Space project. Unhide the next design and follow steps 4–7.
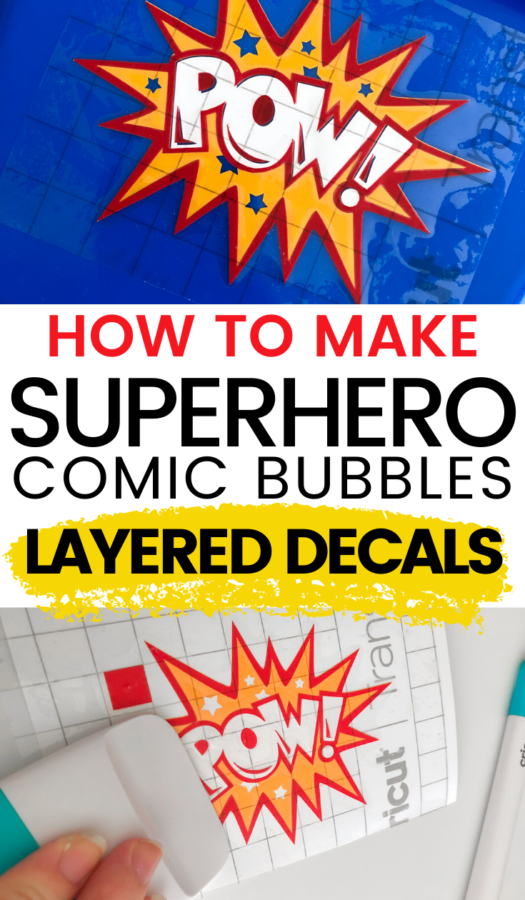
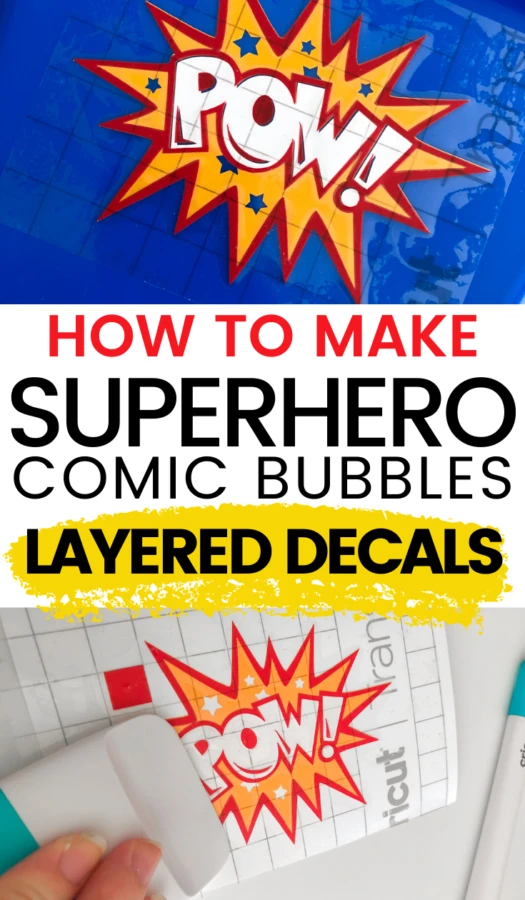
How to Layer Vinyl for Superhero Comic Bubble Decals
Follow these steps for layering your permanent vinyl to make the cute comic bubble decals:

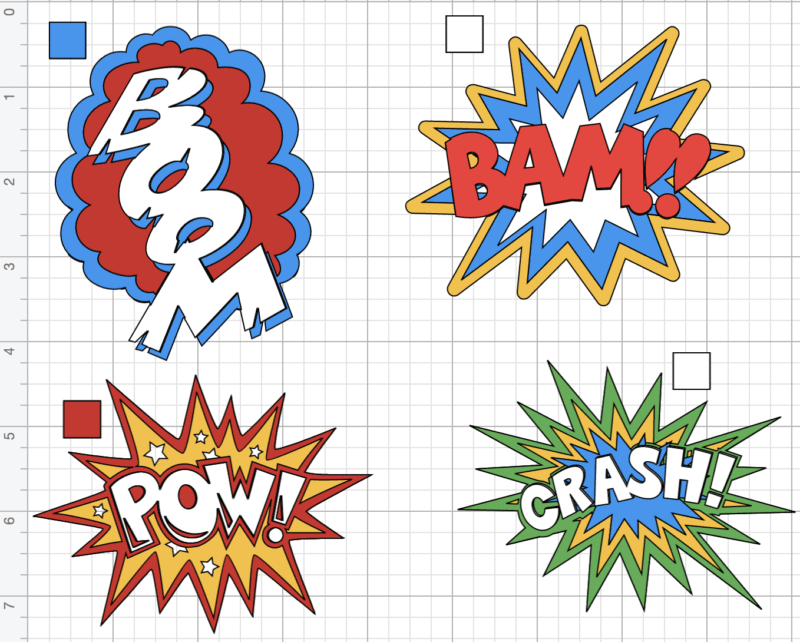
- Use the above screenshot or the project design screen to remember exactly how the final decal should look.
- To Align each layer just right, line the squares on each design.
Here's a breakdown of exactly how to layer each design:
NOTE: The top layer will be placed onto the layer above it and so on. The final layer is the bottom layer which is to be placed on the object of your choice. In this project – the storage bins.
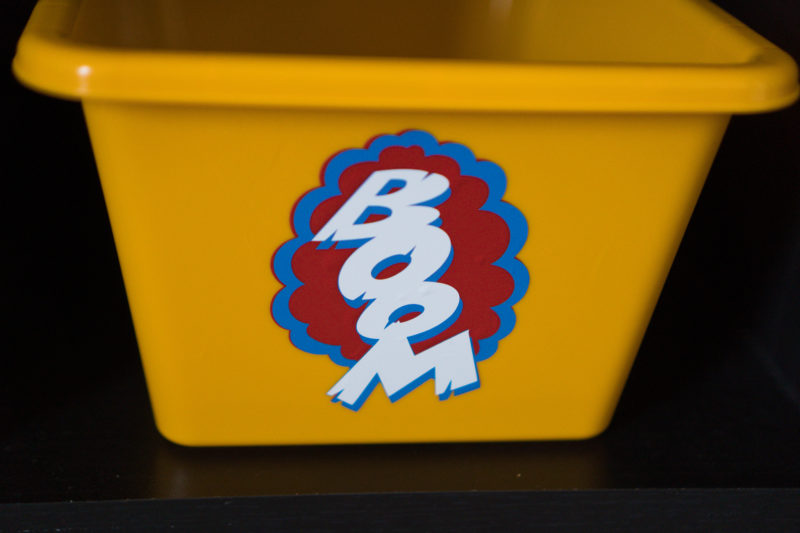
BOOM DESIGN:
- First Layer: White
- Second Layer: Red
- Third Layer: Blue
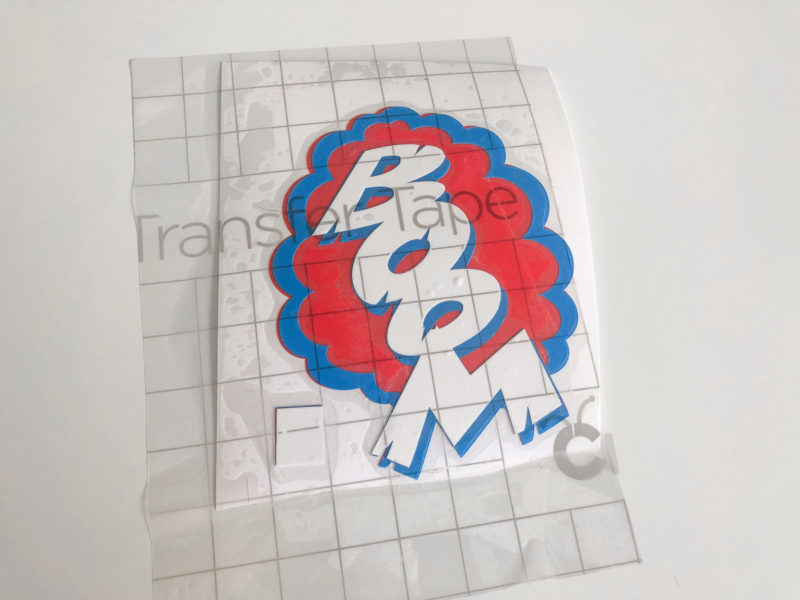

How to layer: Place transfer tape on the white layer first. Then, align the white layer on top of the red. Finally align the blue on top of the rest of the design.
Cut the squares off of the design before applying decal to final surface.
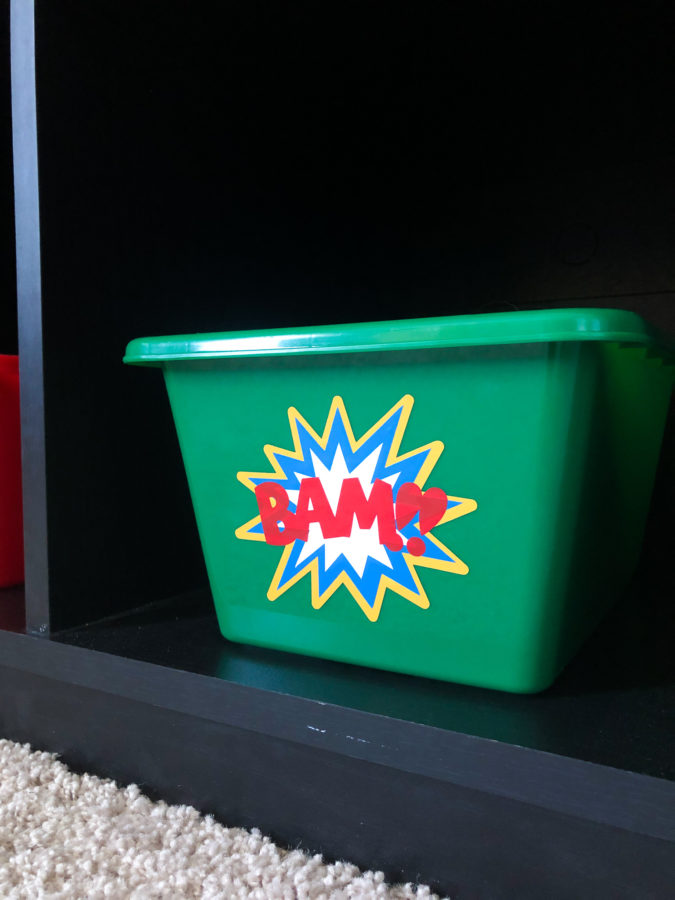

BAM!! DESIGN:
- First Layer: Red
- Second Layer: White
- Third Layer: Blue
- Final Layer: Yellow
How to layer: Place transfer tape on the red layer first. Then, align the red layer on top of the white. Next, align the red & white layers on top of the blue. Finally, place the Red, White, and Blue layers on top of the yellow.
Cut the squares off of the design before applying decal to final surface.
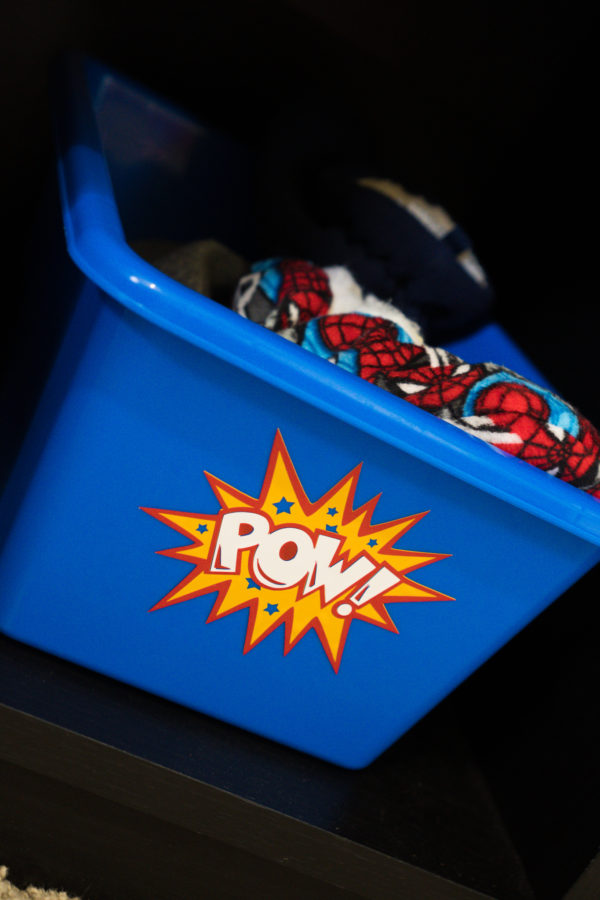
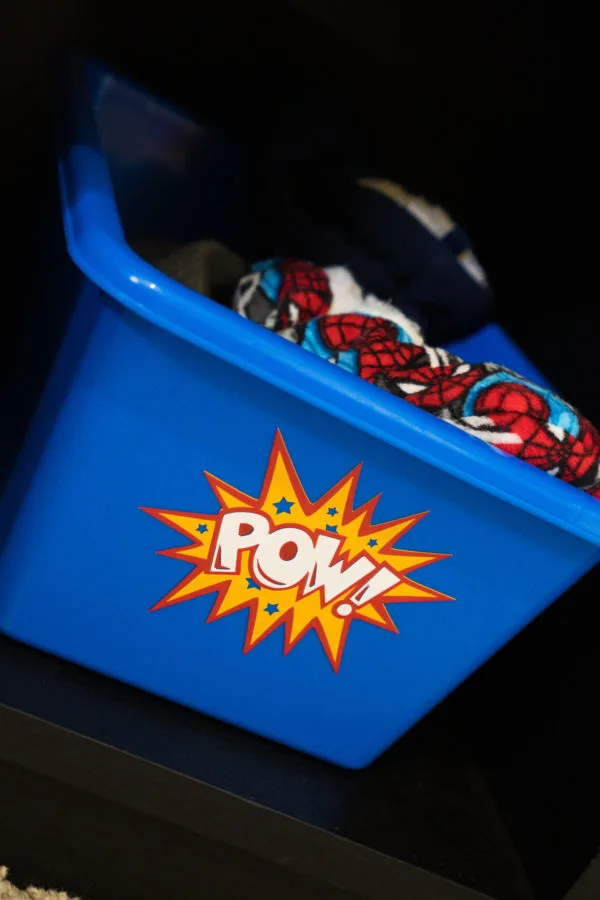
POW! DESIGN:
- First Layer: White
- Second Layer: Red
- Third Layer: Yellow

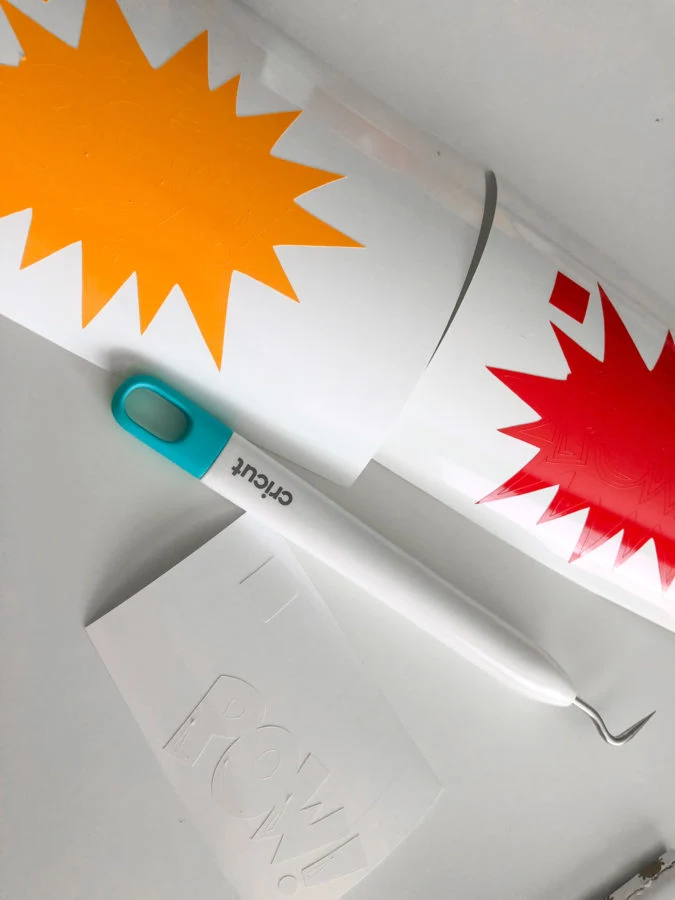
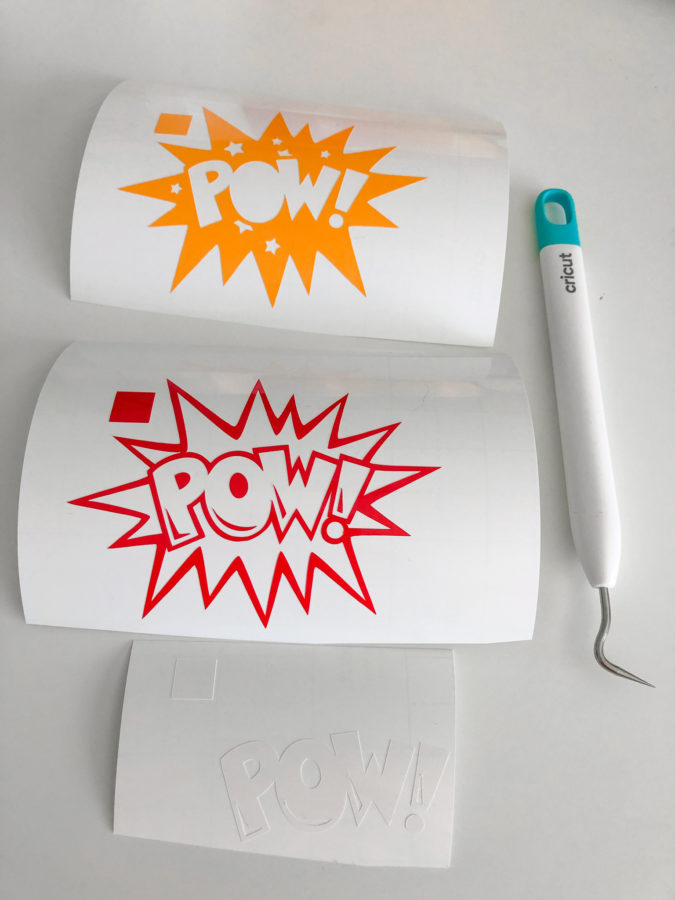

How to layer: Place transfer tape on the white layer first. Then, align the white layer on top of the yellow. Next, place the RED layer on top of the other layer.
Cut the squares off of the design before applying decal to final surface.


CRASH! DESIGN:
- First Layer: White
- Second Layer: Blue
- Third Layer: Yellow
- Final Layer: Green
How to layer: Place transfer tape on the white layer first. Then, align the white layer on top of the blue. Then, place the white and blue onto the yellow layer. Finally, apply the green on top of the whole design.
Cut the squares off of the design before applying decal to final surface.

Additional Tips and Notes
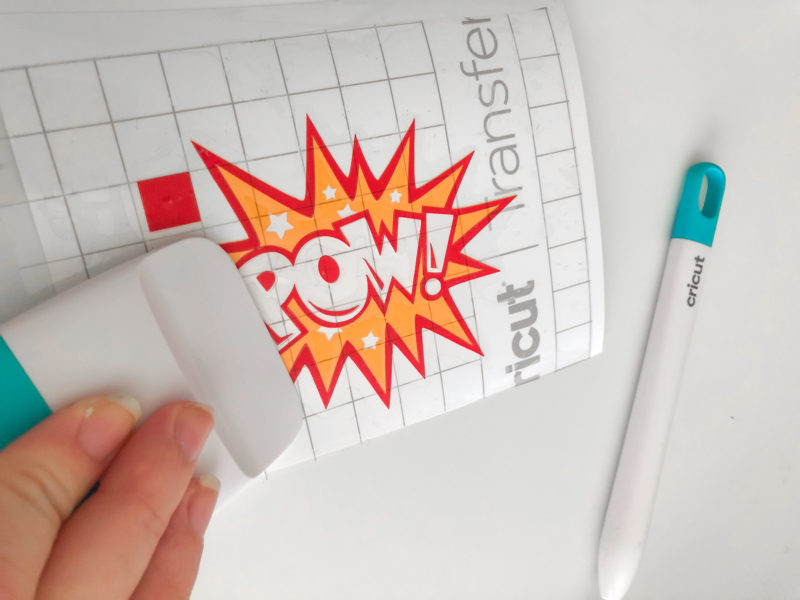
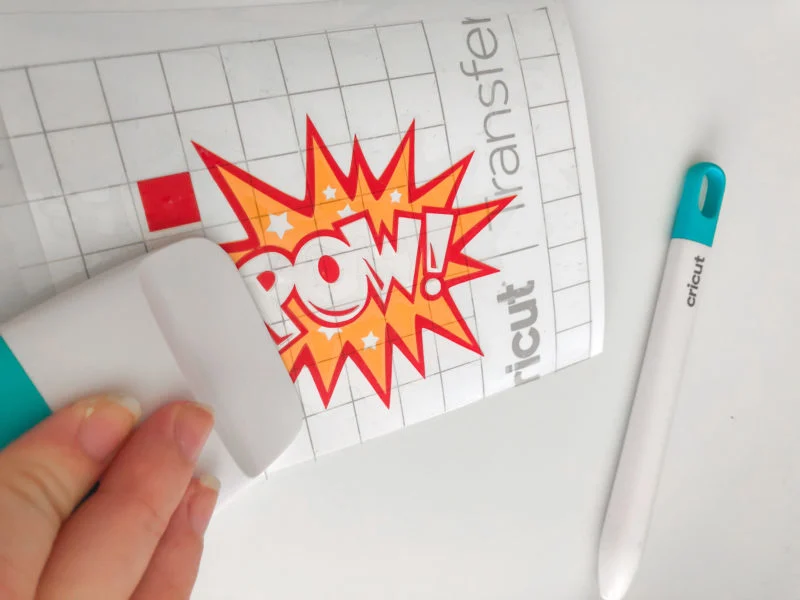
- Use the Cricut scraper tool when placing transfer tape on top of vinyl. Apply pressure to tape with tool to ensure every tiny detail of the vinyl is picked up with the tape.
- I also like to use the scraper tool when applying each layer on top of another. I slowly apply the vinyl, using the tool, to prevent bubbles.
- You should also use the scraper tool to carefully apply final design onto the surface of your choice.
Get more home improvement and customization ideas on the Cricut Inspiration page!

… [Trackback]
[…] There you will find 8990 more Info on that Topic: butfirstjoy.com/superhero-comic-bubble-vinyl-decals/ […]
… [Trackback]
[…] Information to that Topic: butfirstjoy.com/superhero-comic-bubble-vinyl-decals/ […]
… [Trackback]
[…] Find More to that Topic: butfirstjoy.com/superhero-comic-bubble-vinyl-decals/ […]
… [Trackback]
[…] Find More on to that Topic: butfirstjoy.com/superhero-comic-bubble-vinyl-decals/ […]
… [Trackback]
[…] Here you will find 35913 additional Information on that Topic: butfirstjoy.com/superhero-comic-bubble-vinyl-decals/ […]
… [Trackback]
[…] Read More on that Topic: butfirstjoy.com/superhero-comic-bubble-vinyl-decals/ […]
… [Trackback]
[…] Info on that Topic: butfirstjoy.com/superhero-comic-bubble-vinyl-decals/ […]
… [Trackback]
[…] Information on that Topic: butfirstjoy.com/superhero-comic-bubble-vinyl-decals/ […]
… [Trackback]
[…] Find More Information here to that Topic: butfirstjoy.com/superhero-comic-bubble-vinyl-decals/ […]
… [Trackback]
[…] Find More on to that Topic: butfirstjoy.com/superhero-comic-bubble-vinyl-decals/ […]
… [Trackback]
[…] There you will find 20167 additional Info on that Topic: butfirstjoy.com/superhero-comic-bubble-vinyl-decals/ […]
… [Trackback]
[…] Read More on to that Topic: butfirstjoy.com/superhero-comic-bubble-vinyl-decals/ […]
… [Trackback]
[…] Find More on to that Topic: butfirstjoy.com/superhero-comic-bubble-vinyl-decals/ […]
… [Trackback]
[…] Find More Info here to that Topic: butfirstjoy.com/superhero-comic-bubble-vinyl-decals/ […]
… [Trackback]
[…] Read More here to that Topic: butfirstjoy.com/superhero-comic-bubble-vinyl-decals/ […]