
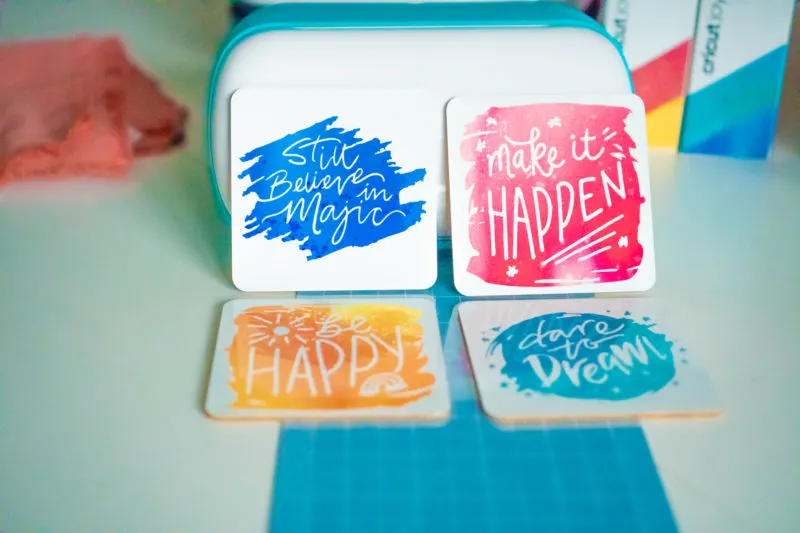
If you're in need of a little joy, trying learning how to make coasters with Cricut Joy Infusible Ink Transfer Sheets. This tutorial was sponsored by Cricut.
The inspirational coasters I made are great for gifting or keeping in your work space!
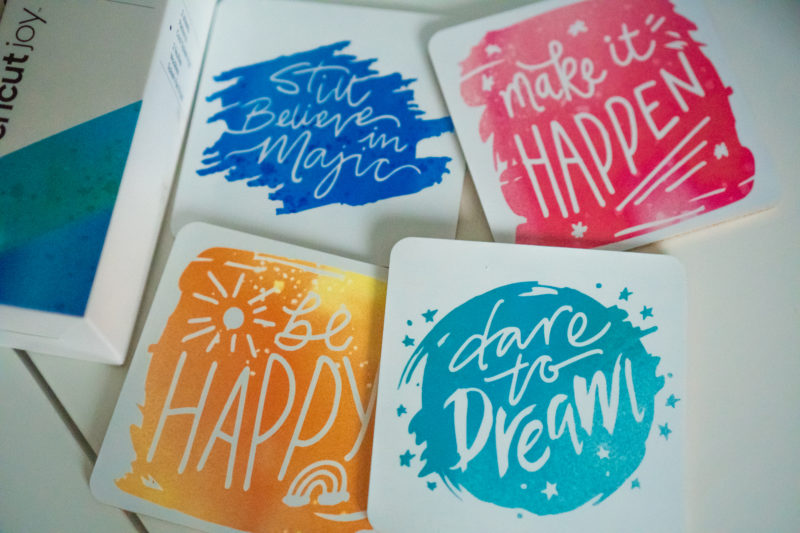

The best part? These Infusible Ink™ coasters are simple to make – even for beginners! I used the tutorial on the Cricut help site, plus the little knowledge of the Cricut Joy I had.
It's important to note that this was my first time using the Cricut Infusible Ink Transfer Sheets. Basically, it's intimidating at first but very easy for beginners!

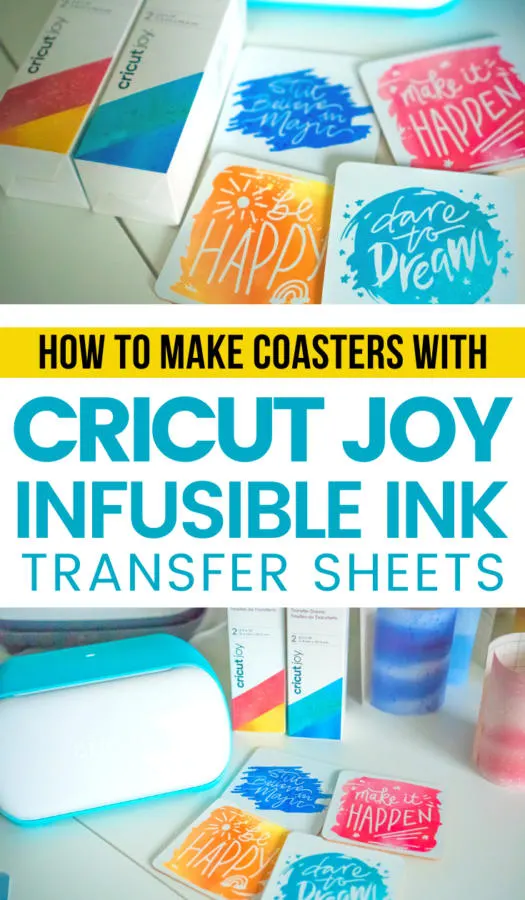
How To Make Inspirational Coasters With Cricut Joy Infusible Ink Transfer Sheets
Now for the fun stuff – I'm going to give you an easy, step-by-step tutorial for how to Make Coasters with the Cricut Joy Infusible Ink Transfer Sheets. All the designs can be found right in the Cricut Design Space.
Before beginning, I recommend subscribing to Cricut Access for over 100k images and thousands of beautiful fonts for your Cricut designs. It's not a requirement for this tutorial but it makes creating so much more fun!
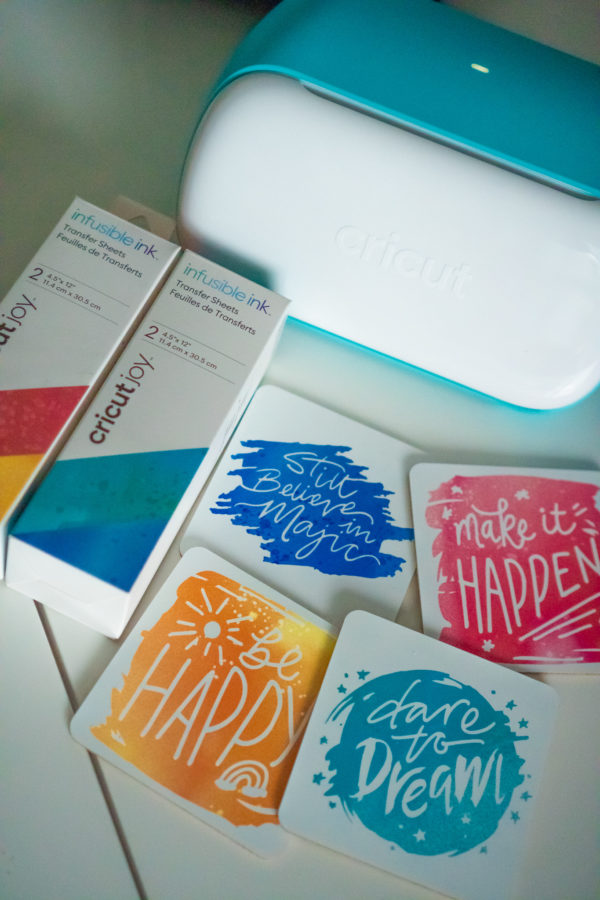
What You Need to Make Coasters with Cricut Infusible Ink
Please keep in mind that I am using the Cricut Joy for this Infusible Ink coaster tutorial so my materials are specific to the Cricut Joy. However, you can just as easily use your Cricut machine with the compatible supplies.

- Grab my designs in the Cricut Design Space
- Cricut Joy cutting machine
- Cricut StandardGrip Mat or Cricut LightGrip Mat
- Cricut EasyPress 2
- Cricut EasyPress Mat (I used a towel because my EasyPress Mat hasn't arrived yet)
- Cricut Coaster Blank, Square (compatible with Infusible Ink)
- Cricut Joy Infusible Ink Transfer Sheets
- Laser copy paper (plain printer paper)
- Butcher paper (included with Infusible Ink Transfer Sheets)
- White Cardstock (80 lb) – (colored cardstock not recommended)
- Lint-free cloth (this should be included with your transfer sheets)
- Scissors
- Tweezers (optional – I used my fingers)
Cricut Infusible Ink Coasters Tutorial
1. Create your design in Cricut Design Space or use the designs I used. Be sure to keep the sizing as is if you're using the square Cricut Coaster Blanks. Or, keep the size of your coaster in mind when designing.
TIP: Be sure to keep your settings as “cut” in the Design Space and change the colors of each design (or leave as is if using my design). By changing the colors, you're telling Cricut to take a break in between cuts so you can switch our your paper.
2. Click the green MAKE IT button in the top right corner of the Cricut Design Space.
3. Choose your load settings: “On Mat” – click done.
4. IMPORTANT: Select the MIRROR option for each design you're going to cut. You can do this by scrolling down the left side of your design space as seen in the screenshot below.
Once you turn MIRROR on, you'll notice the button turns green and your design has flipped and the text will be backwards! That's exactly how you want it!
5. When you're ready, select continue and select your Cricut device from the dropdown menu.
6. Choose your material by selecting “browse all materials” and searching “transfer sheets”. Select Iron-On Infusible Ink Transfer Sheets. If you plan to use these often, star it to make it a favorite so you don't have to search for each project.
Leave “Pressure” as Default.
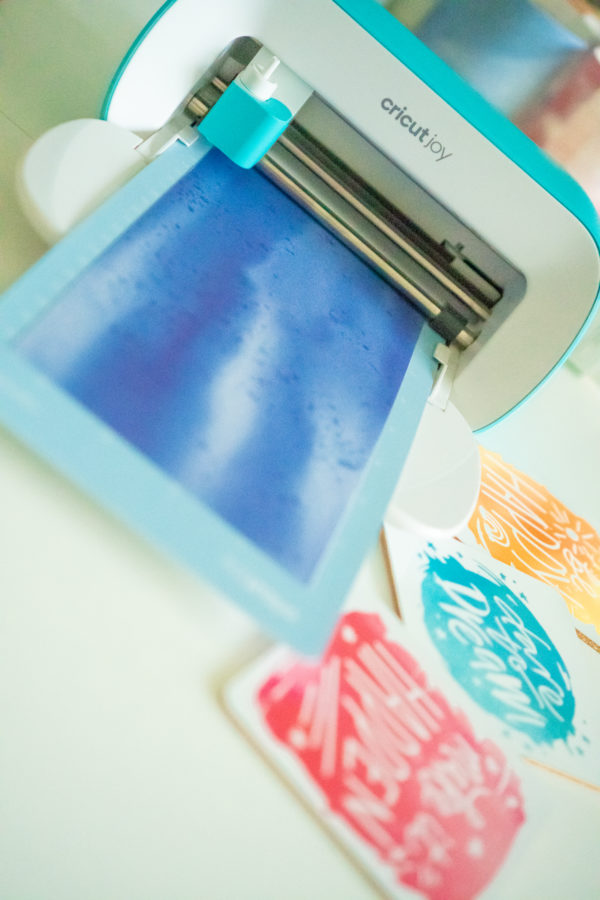

7. With CLEAN and DRY hands, place your Cricut Joy Infusible Ink Transfer Sheet FACE UP on your Cricut Cutting Mat.
8. Be sure your Cricut Joy Fine-Point Blade is loaded into the machine. Feed the cutting mat into the machine.
Once both are loaded properly, your Cricut Joy will pull the mat into the machine to align properly.
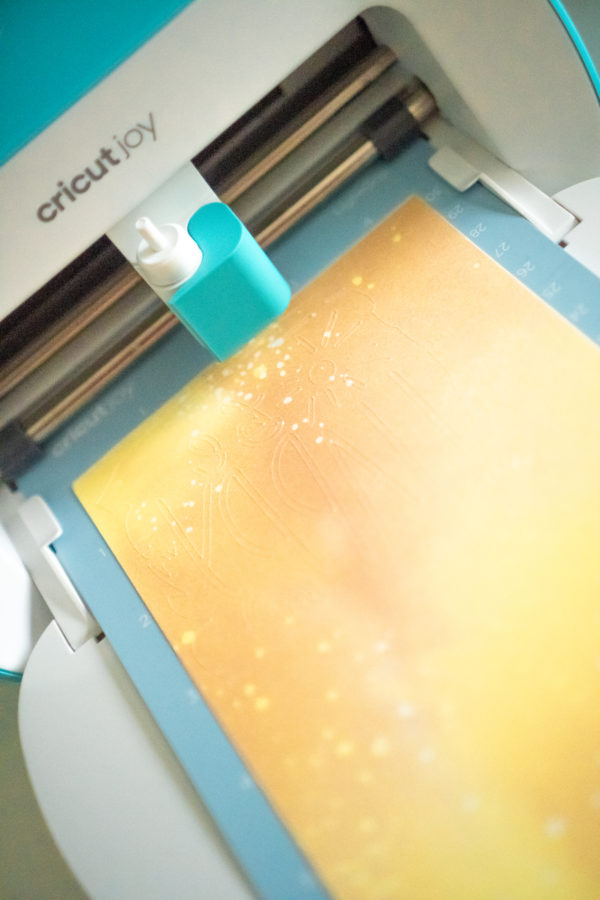

9. Click GO and wait! When your design has been completely cut, your Cricut Design Space will notify you.
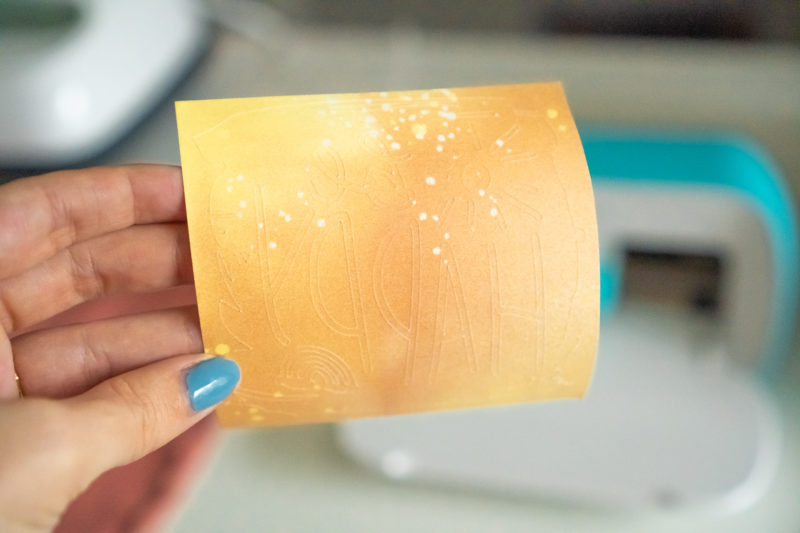
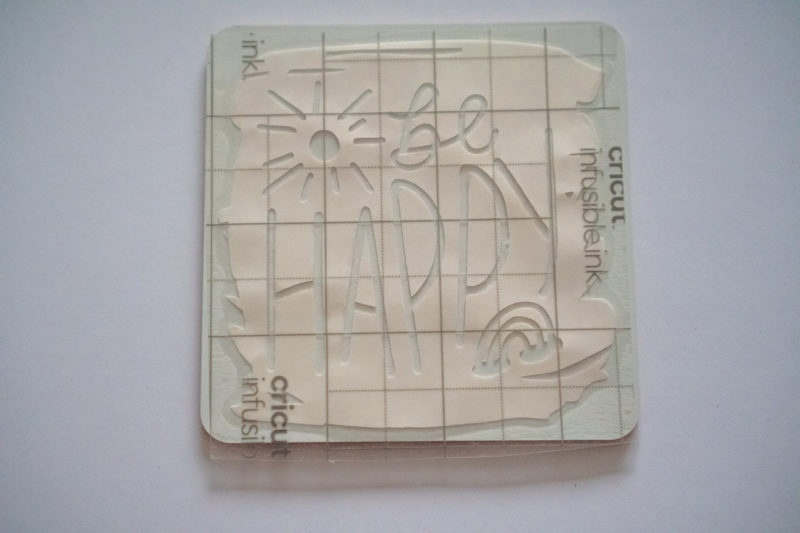
10. Click unload, remove the mat, and carefully peel the mat off the back of the Cricut Infusible Ink Transfer Sheet.
11. Trim the design with scissors so there is a square box around the design. You don't want to waste any of your precious Infusible Ink Transfer Sheets!


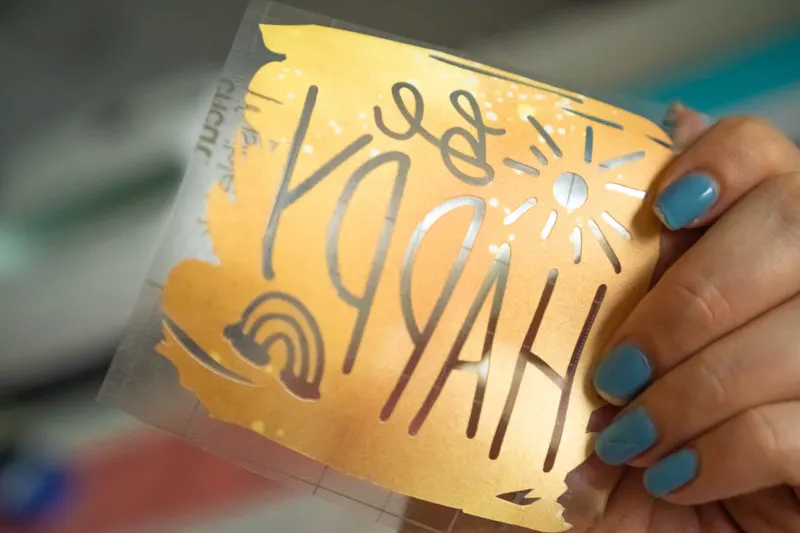
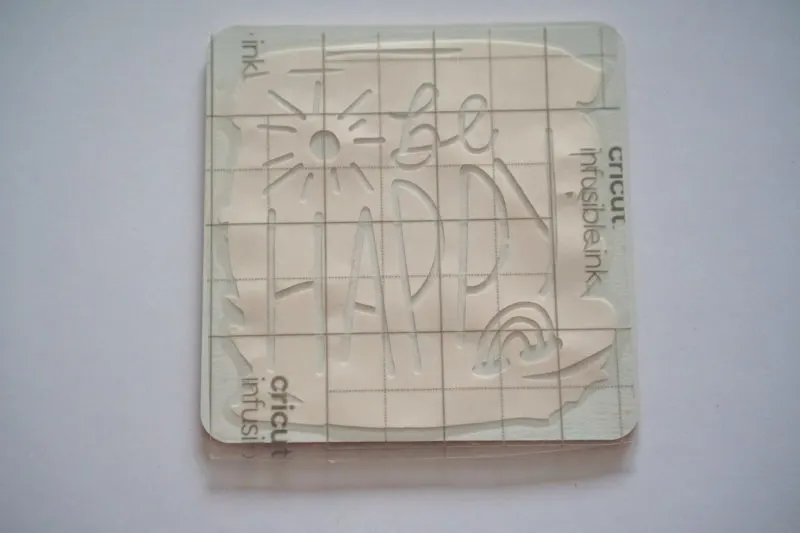
12. Now, begin weeding the design with your fingers or tweezers. I prefer fingers vs tweezers because I am afraid tweezers will scratch the ink on the delicate Infusible Ink Transfer Sheet.
TIP: Using my fingers, I like to weed the extra trim away from the outer part of the design first. Then, I handle the tiny pieces from the inside of the design and finish off with the larger pieces or letters.
Tip 2: Be careful not to force any pieces of the design. Since this isn't vinyl, the design can be easily ripped. Slowly move and bend the design to remove unwanted pieces.
Remember, you want to weed out the pieces you DON'T want on the final design.

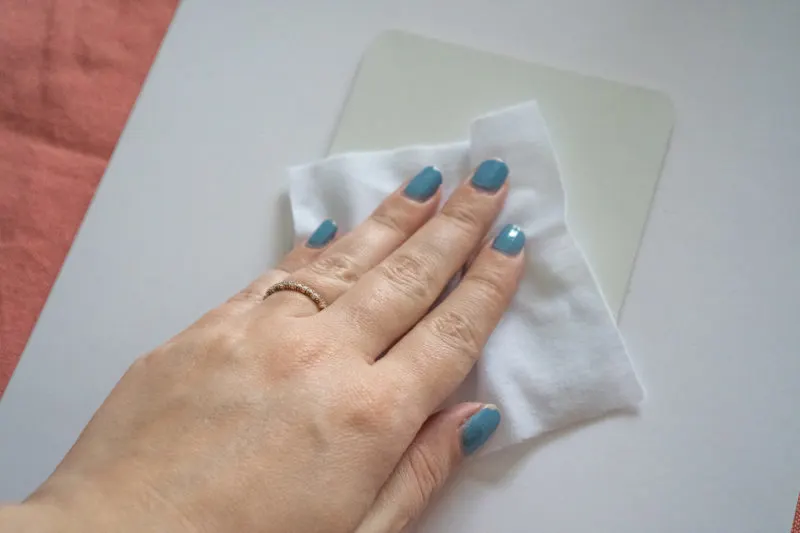
13. Next, wipe down your Cricut Coaster Blanks with a lint-free cloth to remove any unwanted particles.
14. Place your design ink side DOWN onto the coaster and press with your hands into each piece is secure. If it is uneven, slowly peel it off and realign! It's easy enough.
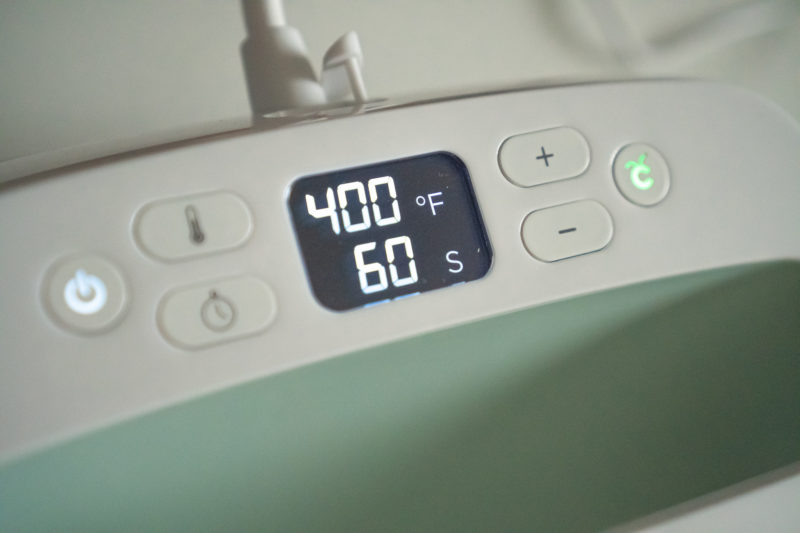
15. Preheat your Cricut EasyPress 2 to 400 degrees at 60 seconds and press the green C button to heat EasyPress. Once ready, the machine will beep at you.
16. Place your white card stock on top of your Cricut EasyPress Mat to protect the surface.
17. Now, place the prepared coaster, centered, on top of the card stock and place a sheet of clean, unused butcher paper (included with transfer sheets) on top the coaster for protection.
18. Place heated EasyPress on top of coaster, ensuring coaster is fully covered by EasyPress plate, and press the green C button to begin the 60 second countdown.
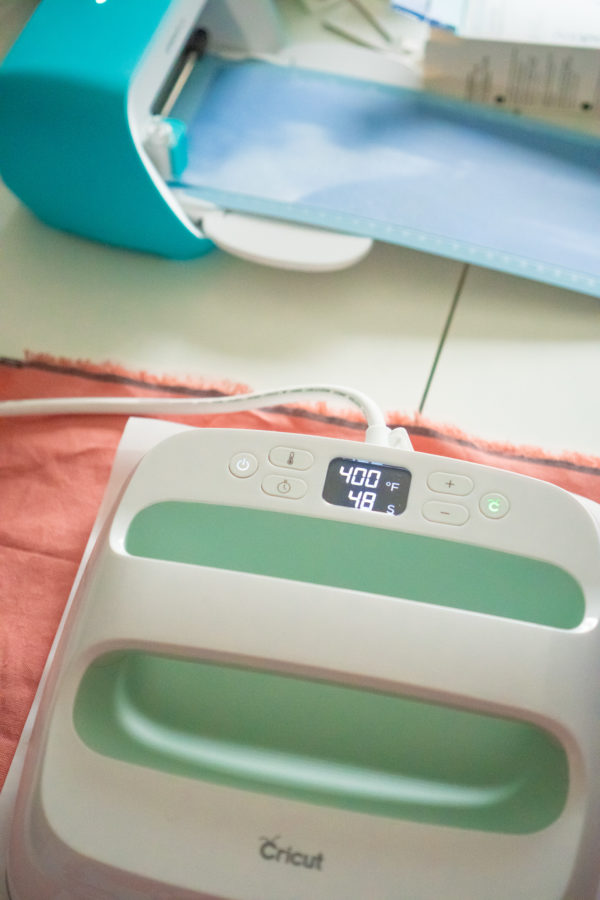

19. Do not apply any pressure to the EasyPress as the weight is perfect for this particular project. Just allow the machine to do it's job.
20. When EasyPress is finished, it will beep at you. Remove EasyPress and place back on holder. At this point, I recommend powering off the EasyPress for safety.
21. Now, you can carefully remove the butcher paper from your coaster.
After the coaster is completely cool, you can remove the transfer sheet and see completed design! Isn't it beautiful?
22. Finish the other coasters by repeating steps 8 and above!


Tips for Working with Cricut Infusible Ink Transfer Sheets
- Always work with clean and dry hands, as these particular materials are sensitive to moisture and can be stained easily. If you have sweaty palms, wear gloves if you can or prepare to dry them often!
- Cricut Infusible Ink Transfer Sheets are always more bright and vibrant after being pressed than they look on the sheet itself. So, don't be discouraged by the colors. The box of the sheets is the best depiction of what the design will look like.
- The ink on the finished design will never flake, peel, crack, wrinkle, or bleed. Basically, these are great for the moisture of coasters and even safe in the wash after pressing onto a Cricut Blank.
However, you should always follow instructions for caring for your finished design. - The sheets themselves should be stored in a dark, dry place before using as they are sensitive to moisture and light.
- The Cricut Infusible Ink Transfer Sheets will work best on Cricut-branded compatible materials as these items are all specifically designed to work together.

Compatible Items for Cricut Infusible Ink Transfer Sheets:
Cricut has lots of great blanks that are compatible with Cricut Infusible Ink Transfer Sheets. These products were designed to give the best results with the infusible ink so I highly recommend them!
- Women's Fitted T-Shirt (Heathered Gray)
- Unisex T-Shirt Blank, Crew Neck (Heathered Gray)
- Men's T-Shirt Blank, Crew Neck (White)
- Women's T-Shirt Blank, V-Neck (White)
- Baby Bodysuit Blank
- Youth T-Shirt Blank, Crew Neck
- Coaster Blank, Square
- Coaster Blank, Circle
- Tote Bag Blank (Medium or Large)
… [Trackback]
[…] Read More to that Topic: butfirstjoy.com/make-coasters-with-cricut-joy-infusible-ink/ […]
… [Trackback]
[…] Find More to that Topic: butfirstjoy.com/make-coasters-with-cricut-joy-infusible-ink/ […]
… [Trackback]
[…] Here you can find 67389 more Information to that Topic: butfirstjoy.com/make-coasters-with-cricut-joy-infusible-ink/ […]
… [Trackback]
[…] Find More on that Topic: butfirstjoy.com/make-coasters-with-cricut-joy-infusible-ink/ […]
… [Trackback]
[…] Read More here to that Topic: butfirstjoy.com/make-coasters-with-cricut-joy-infusible-ink/ […]
… [Trackback]
[…] Here you will find 48420 additional Info on that Topic: butfirstjoy.com/make-coasters-with-cricut-joy-infusible-ink/ […]
… [Trackback]
[…] There you can find 4483 additional Information to that Topic: butfirstjoy.com/make-coasters-with-cricut-joy-infusible-ink/ […]
… [Trackback]
[…] There you can find 874 additional Info to that Topic: butfirstjoy.com/make-coasters-with-cricut-joy-infusible-ink/ […]
… [Trackback]
[…] Read More here on that Topic: butfirstjoy.com/make-coasters-with-cricut-joy-infusible-ink/ […]
… [Trackback]
[…] Read More on that Topic: butfirstjoy.com/make-coasters-with-cricut-joy-infusible-ink/ […]
… [Trackback]
[…] Find More Info here to that Topic: butfirstjoy.com/make-coasters-with-cricut-joy-infusible-ink/ […]
… [Trackback]
[…] Find More on that Topic: butfirstjoy.com/make-coasters-with-cricut-joy-infusible-ink/ […]
… [Trackback]
[…] Read More here on that Topic: butfirstjoy.com/make-coasters-with-cricut-joy-infusible-ink/ […]
… [Trackback]
[…] Read More on that Topic: butfirstjoy.com/make-coasters-with-cricut-joy-infusible-ink/ […]
… [Trackback]
[…] Information to that Topic: butfirstjoy.com/make-coasters-with-cricut-joy-infusible-ink/ […]
… [Trackback]
[…] Find More to that Topic: butfirstjoy.com/make-coasters-with-cricut-joy-infusible-ink/ […]
[…] guys know how much I enjoy working with Cricut's Infusible Ink; with Infusible Ink coasters being my speciality. For awhile now, I've been brainstorming other ways to use Cricut's blank […]
[…] Visit this page for a full tutorial on how to make coasters with Infusible Ink […]
[…] Tutorial: How To Make Coasters with Cricut Infusible Ink […]
[…] most steady hand. I prefer working with either one layer or sticking to my favorite Cricut material: Infusible Ink Transfer Sheets. However, I wanted to make something extra special to take my son's superhero room to the next […]
[…] Inspirational Coasters made with Infusible Ink Transfer Sheets […]